Create serverless REST API using AWS Lambda API Gateway RDS postgres with Nodejs and Typescript
Creating REST API is very common for web applications and mobile apps. Once it is created, suddenly you need to think, about which server you are going to put the code. Then several questions will arise based on application performance, accessibility, cost, flexibility, and what not. AWS serverless will help you to reduce your certain questions list and get proper answers about them.
Serverless works as a Functions-as-a-Service (FaaS) which offers low cost, no server management, a inherently scalable architecture, quick deployment and update.
Let's Begin...
Prerequisite:
You need to create a NodeJS with Typescript code for REST APIs.
It would be good to have a custom domain for REST endpoints.
Should be installed PostgresSQL locally.
Points will be covered in this tutorial
NodeJs with Typescript code creation
Enable serverless & other necessary npm packages installation
AWS RDS Postgres DB creation
Configuring YAML file & handler creation for lambda
Connect node js with typescript code with Postgres
Deploy & custom domain addition
Test & Error discussion
NodeJS with Typescript Code creation
Initially, I started with simple nodejs, then I thought the same to do using Typescript with Nodejs. As I have started my career with Strongly typed languages like java & Objective C, So it becomes easy to pick up TypeScript with NodeJs. A complete Production-ready REST API creation using NodeJS & Typescript tutorial has been created previously, feel free to check this up.
Also, the boilerplate code base has been uploaded to GitHub. You can find it here.
Enable serverless & other necessary npm packages installation
After downloading the application, start with installing npm packages. By using -g flag the serverless package will install globally.
npm install -g serverless
Also install @types/aws-lambda, serverless-offline, serverless-deployment-bucket as well. We'll use AWS Lambda as the computing service. An AWS Lambda function is basically a container. Once the Lambda is invoked, the container spins up and runs the code.
Along with installation, modify the scripts section in the package.json file like the below -
"deploy": "npm run build && sls deploy --stage dev",
"start-offline": "npm run build && serverless offline --noTimeout"
AWS RDS Postgres DB creation
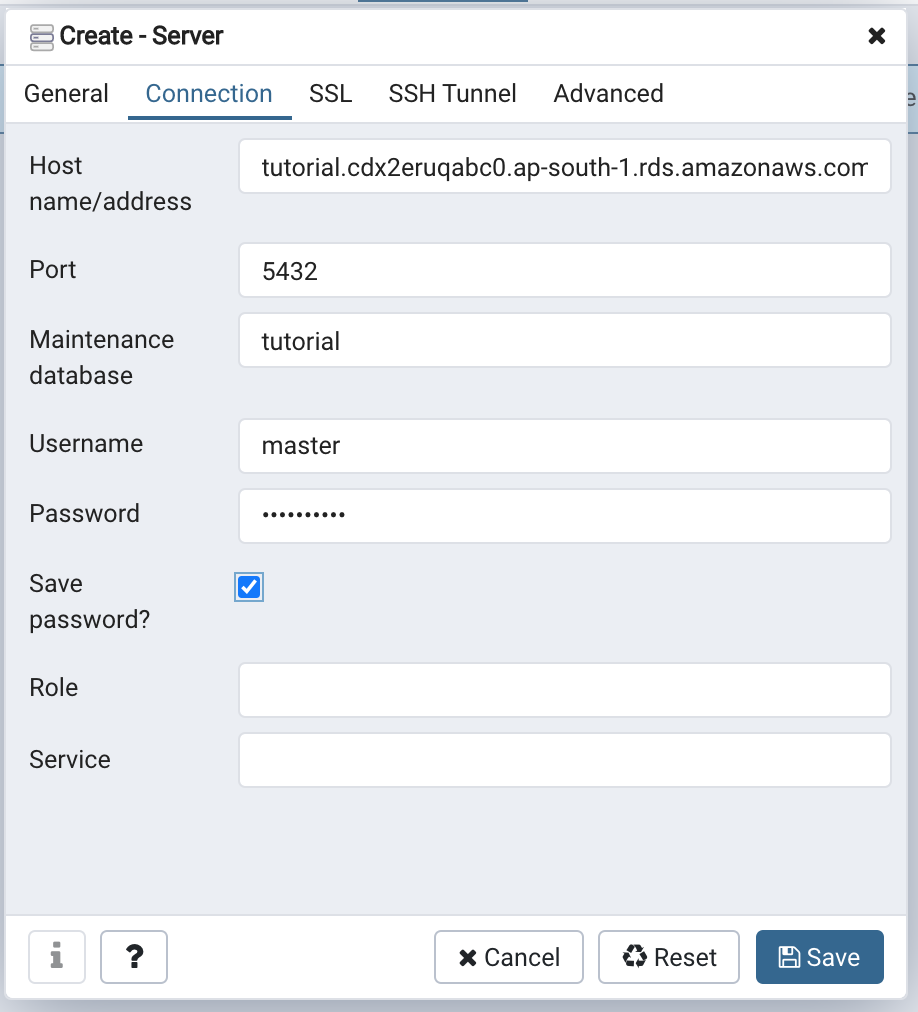
Login to your AWS console and navigate to the RDS window and select PostgresSQL, Version, Obviously for Free tire. Provide DB instance identifier, master username & password. Under the connectivity section, please choose public access as yes, so that you can connect AWS RDS to your locally installed PostgresSQL DB. Also, you can import/export your dump DB file to AWS PostgreSQL DB as well.
Once you click on Create Database, it will take about 10 min to create it. So please wait and once it's status Available, navigate to the details page and keep a few items to be noted in a separate file like notepad or text editor.
The following snapshot might help you to understand better -
Please copy the highlighted Endpoint and open your locally installed PostgresSQL DB.
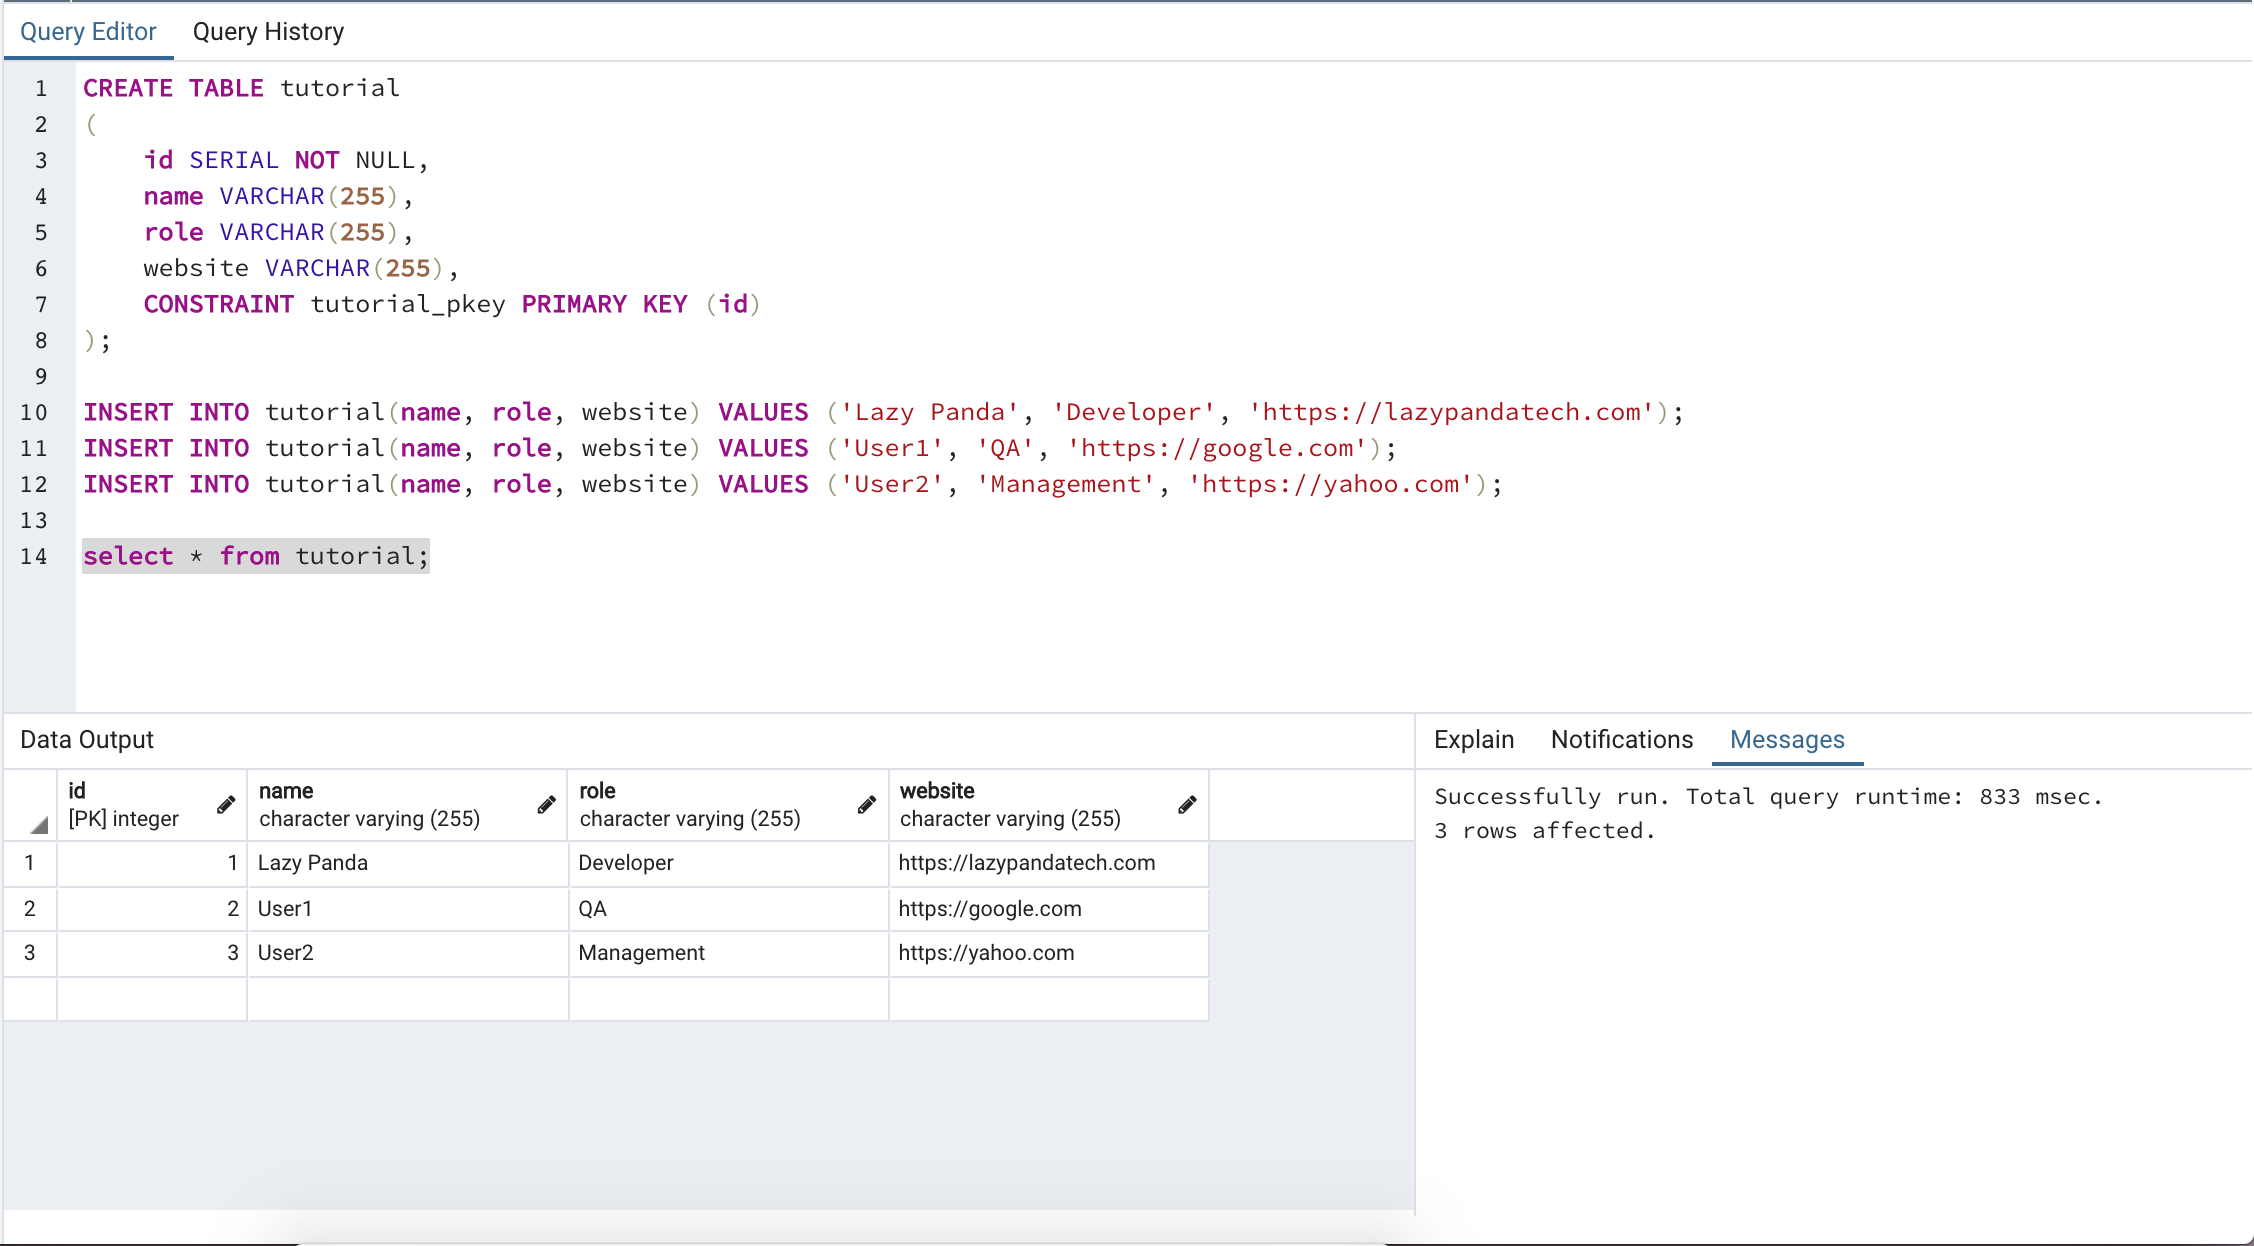
Once AWS RDS PostgreSQL connected successfully, I created a tutorial table and inserted a few data into that table too, like below.
If you have any other DB schema (dump) file, that can also be imported into PostgreSQL by running the following command.
Configuring YAML file & handler creation for lambda
Once you set up / install PostgresSQL locally on your computer and connected with AWS RDS, it's time to create YAML and handler files to your nodejs with the Typescript codebase. The serverless framework can help you to get a scaffold project, but I would suggest creating the files by yourself so that you will get a clear idea on it. Create one serverless.yml file in the project root folder.
As you have seen, in the custom section at the top, I am reading the secrects.json file, and I am loading environment variables and passing them to the environment section. Let's have a look at what the secrets.json file looks like as well.
Next, you need to create a handler.ts file, and placed the following code over there -
Once you modified your code and updated it with business logic, you can build and run it using the serverless-offline command.
npm run start-offline
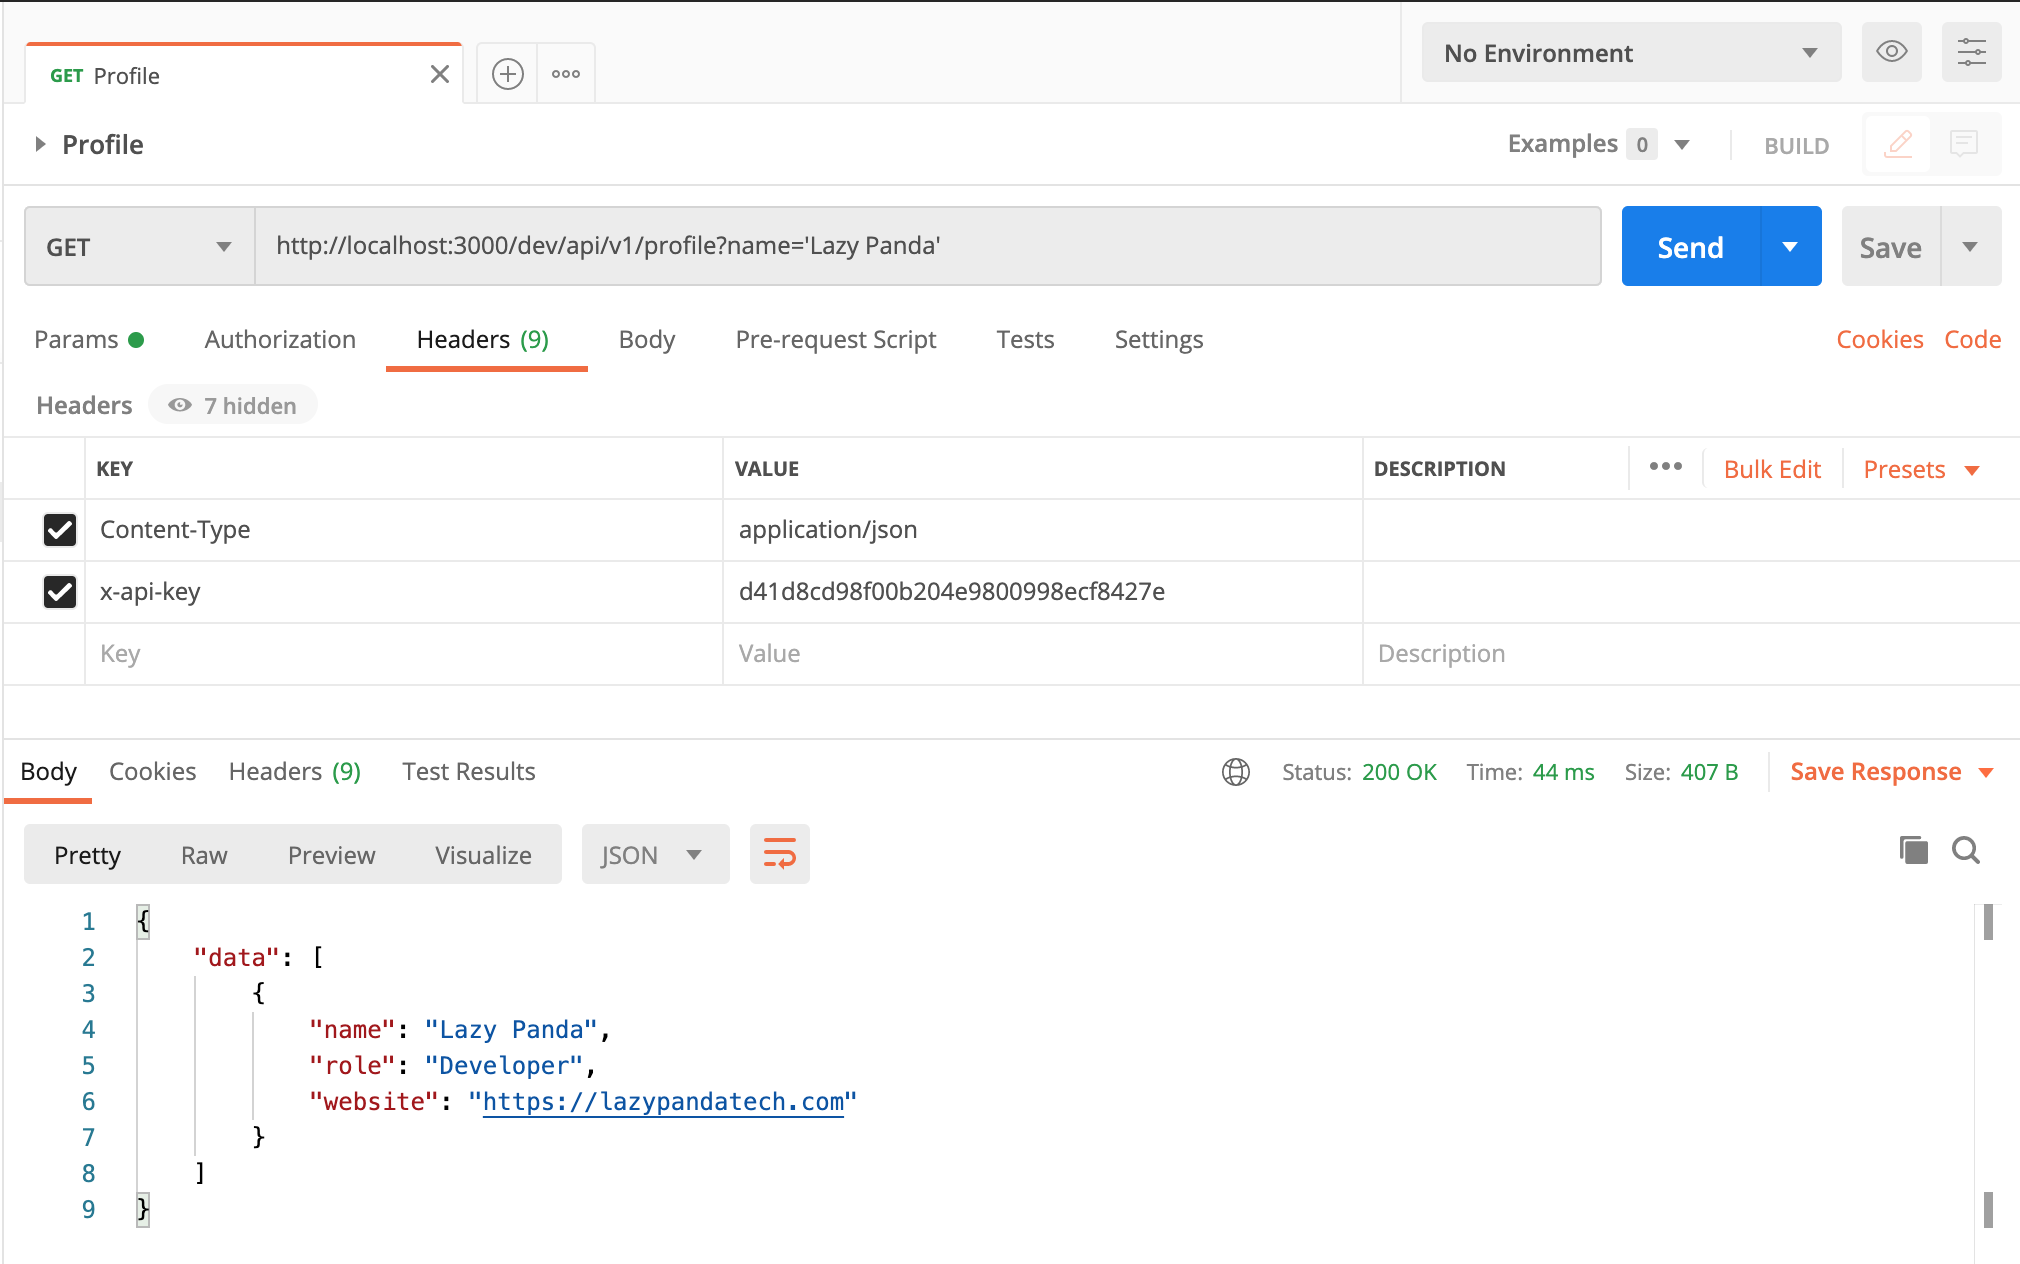
And you could see the node application build successfully and it provides an x-API-key and the endpoint. You need to pass the x-API-key as a header to access the just build REST API.
Connect node js with typescript code with Postgres
Once your REST API build & run perfectly with local data source, now its time to connect with PostgreSQL from nodejs & typescript code. To connect with DB, you need to install few npm packages to make a DB connection and execute queries. If you need details of node with Postgres you can check the node-postgres site.
Please install the following two npm packages -
npm install --save-dev pg
npm install --save-dev @types/pg
The code refers to connect with Postgres with nodejs & typescript.
Deploy & custom domain addition
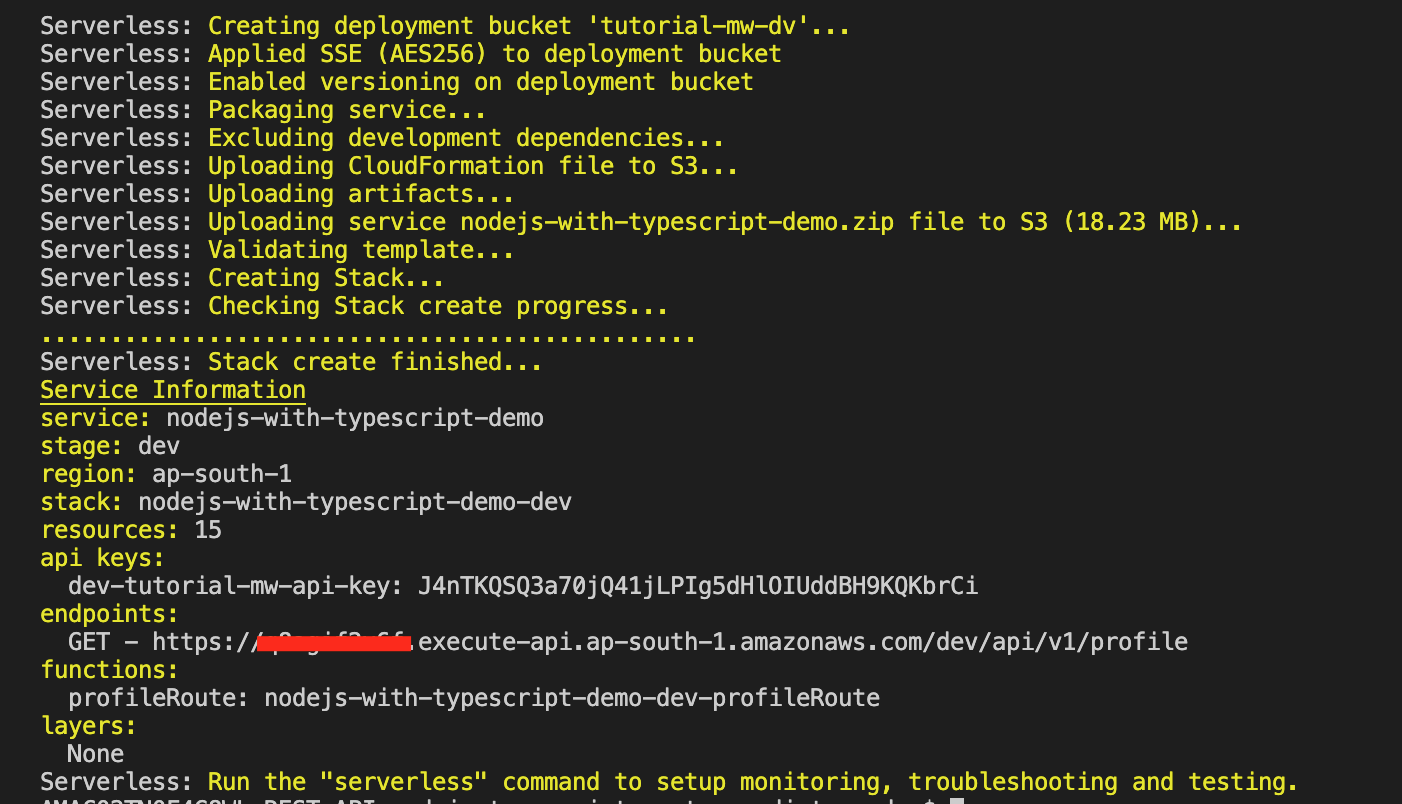
Once your APIs are working perfectly with serverless-offline, you can deploy the code to the serverless lambda function by using a single command.
npm run deploy
The Serverless framework makes deployments quick and painless. It will take care of bundling up, push all code to the S3 bucket and from there it will send it to the lambda function. The following screenshot you will get from your terminal.
Please keep the x-api-key and pass it as a header from postman to check the API is working or not.
For Custom Sub Domain - you can create a sub domain from API Gateway, and add subdomain like tutorial.lazypandatech.com, and saved it.
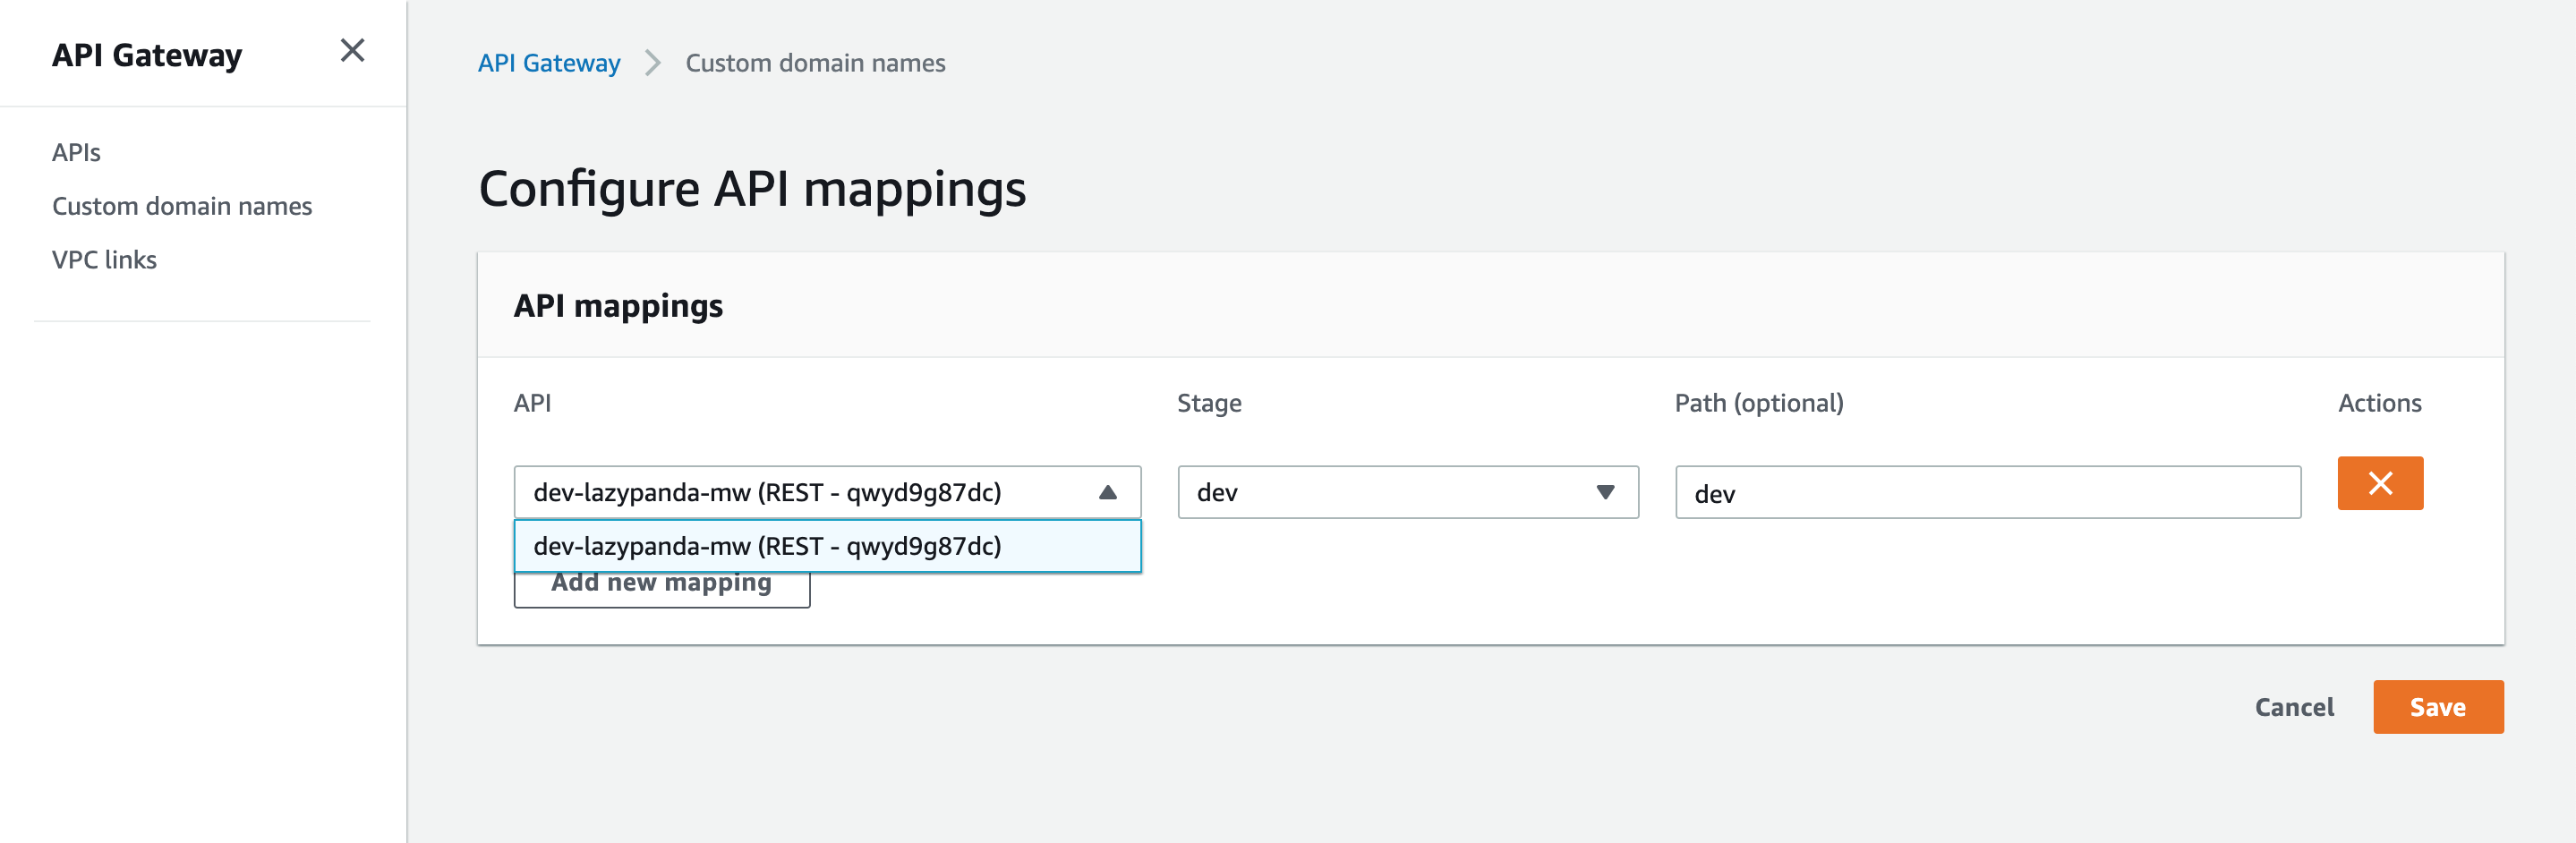
Also set API Mapping there as well, like below
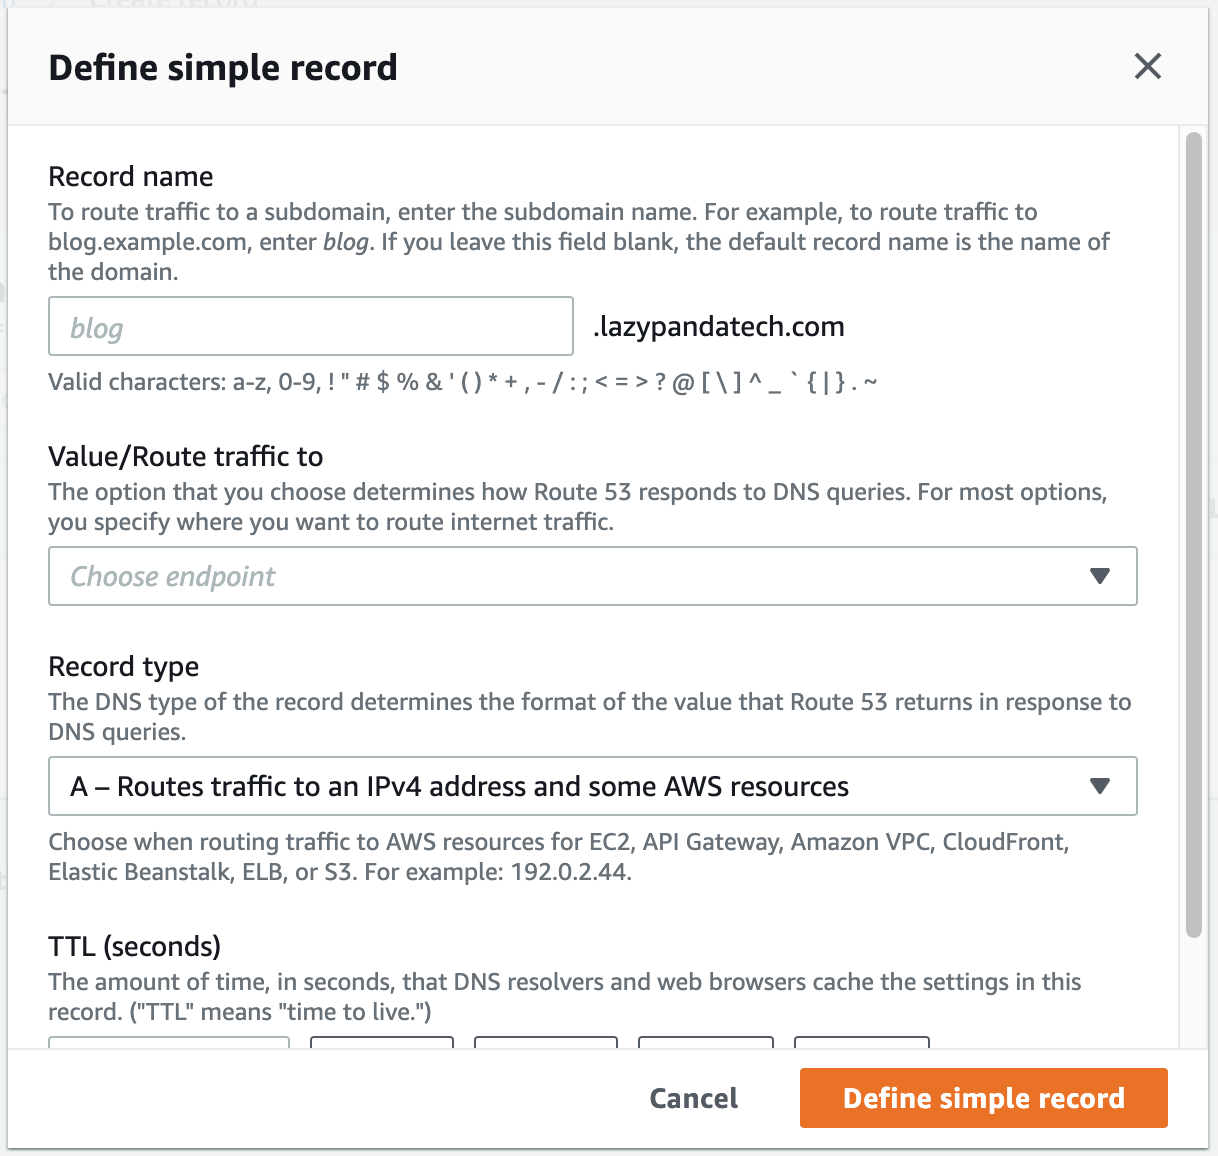
Once you Saved it, it will appear in home page. Now you need to open route53 to create a record. Then select a simple route, Define a simple record and
After defining record set, wait for 10 min to reflect it. For more information about custom domains and deployment, you can check here as well.
Test & Error discussion
Now you can open postman, and execute the endpoint and you could see the response. The following error you may encounter during serverless configuration time or deployment time.
Error 1: Bucket is not there.
To solve this error you need to add the serverless-deployment-bucket as a plugin and mentioned it in your serverless.yml. Also, you need to add the bucket name. Please check the above section for yaml configuration.
npm i serverless-deployment-bucket
Error 2: Invalid API identifier specified
To solve this error, please check the proper endpoint path and make sure you are passing correct x-api-key as header.
Error 3: 429 Too many requests
I have faced this issue couple of times after deploying the code in Lambda functions. I re-deploy the rest API code and got separate x-api-key. Then after it works fine for me.
Error 3: 502 Bad Gateway Or Internal server error
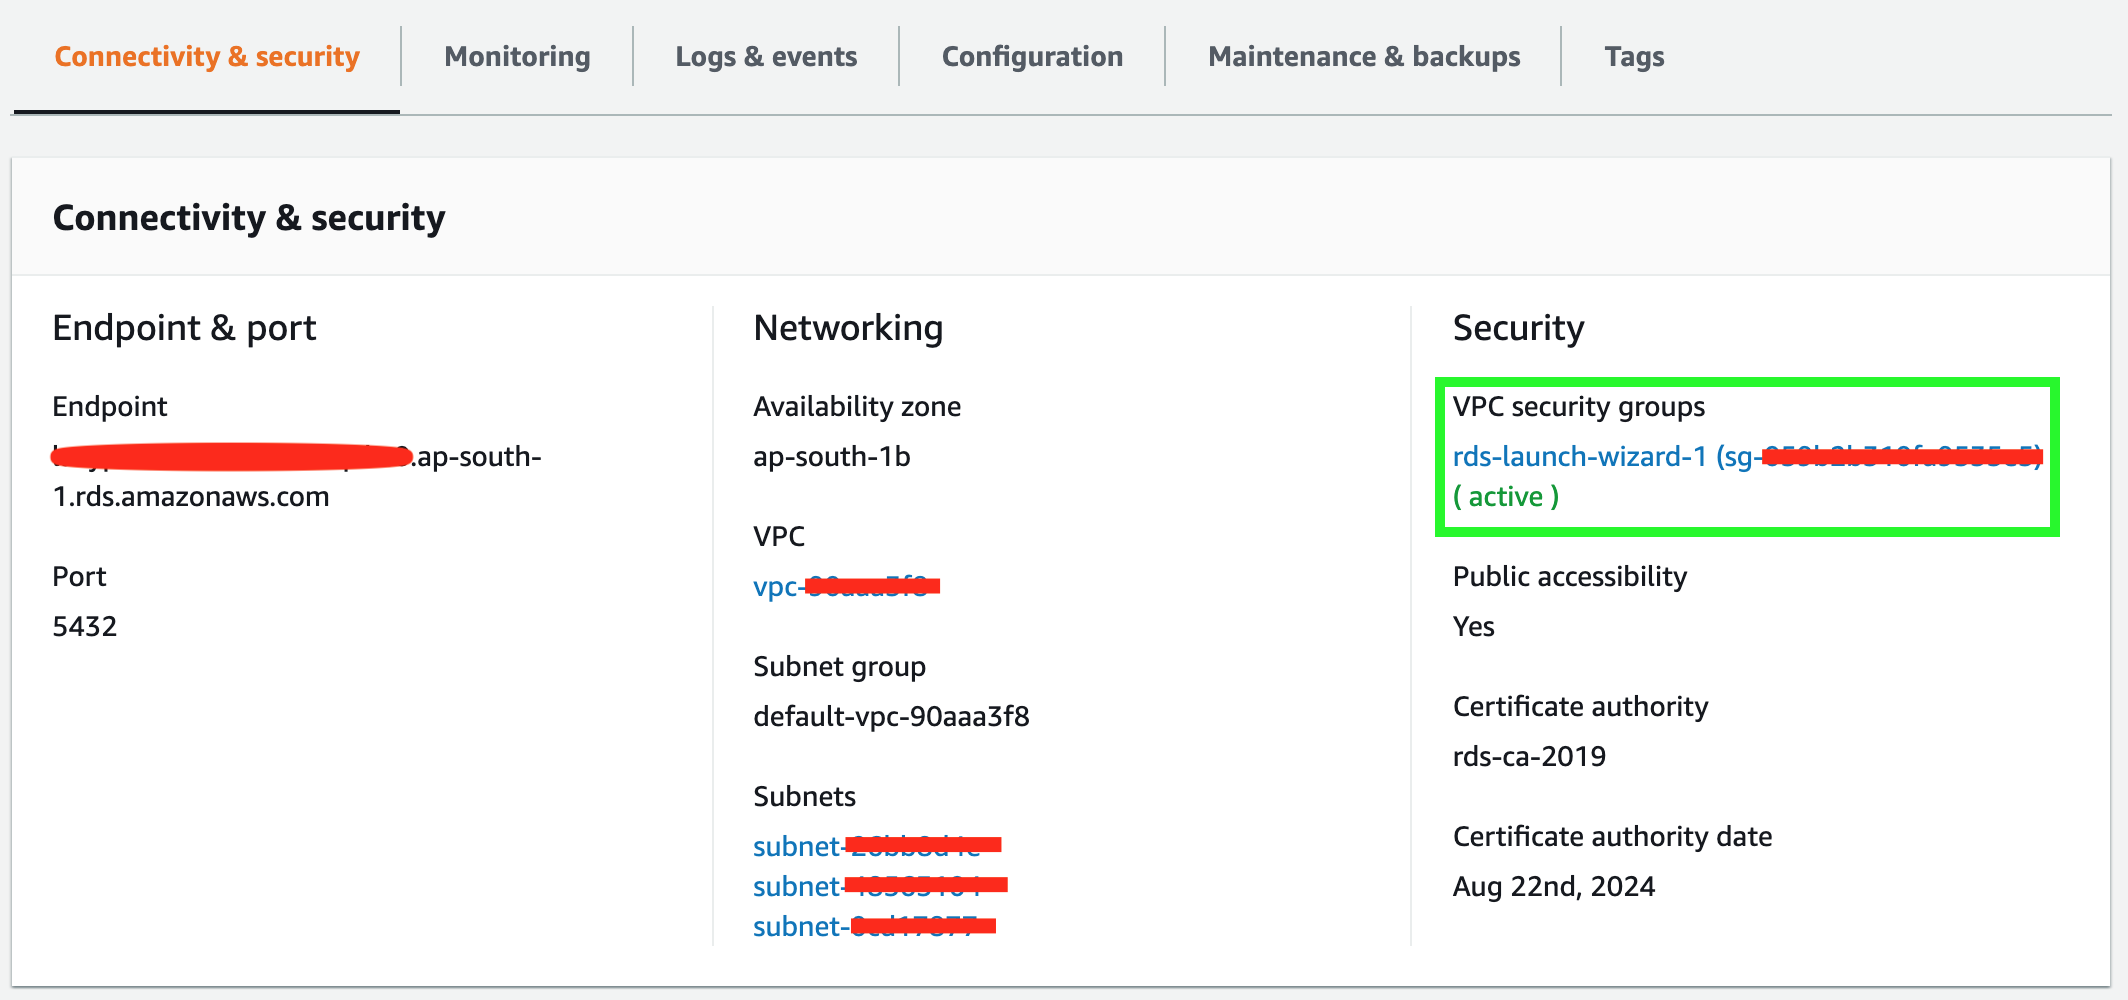
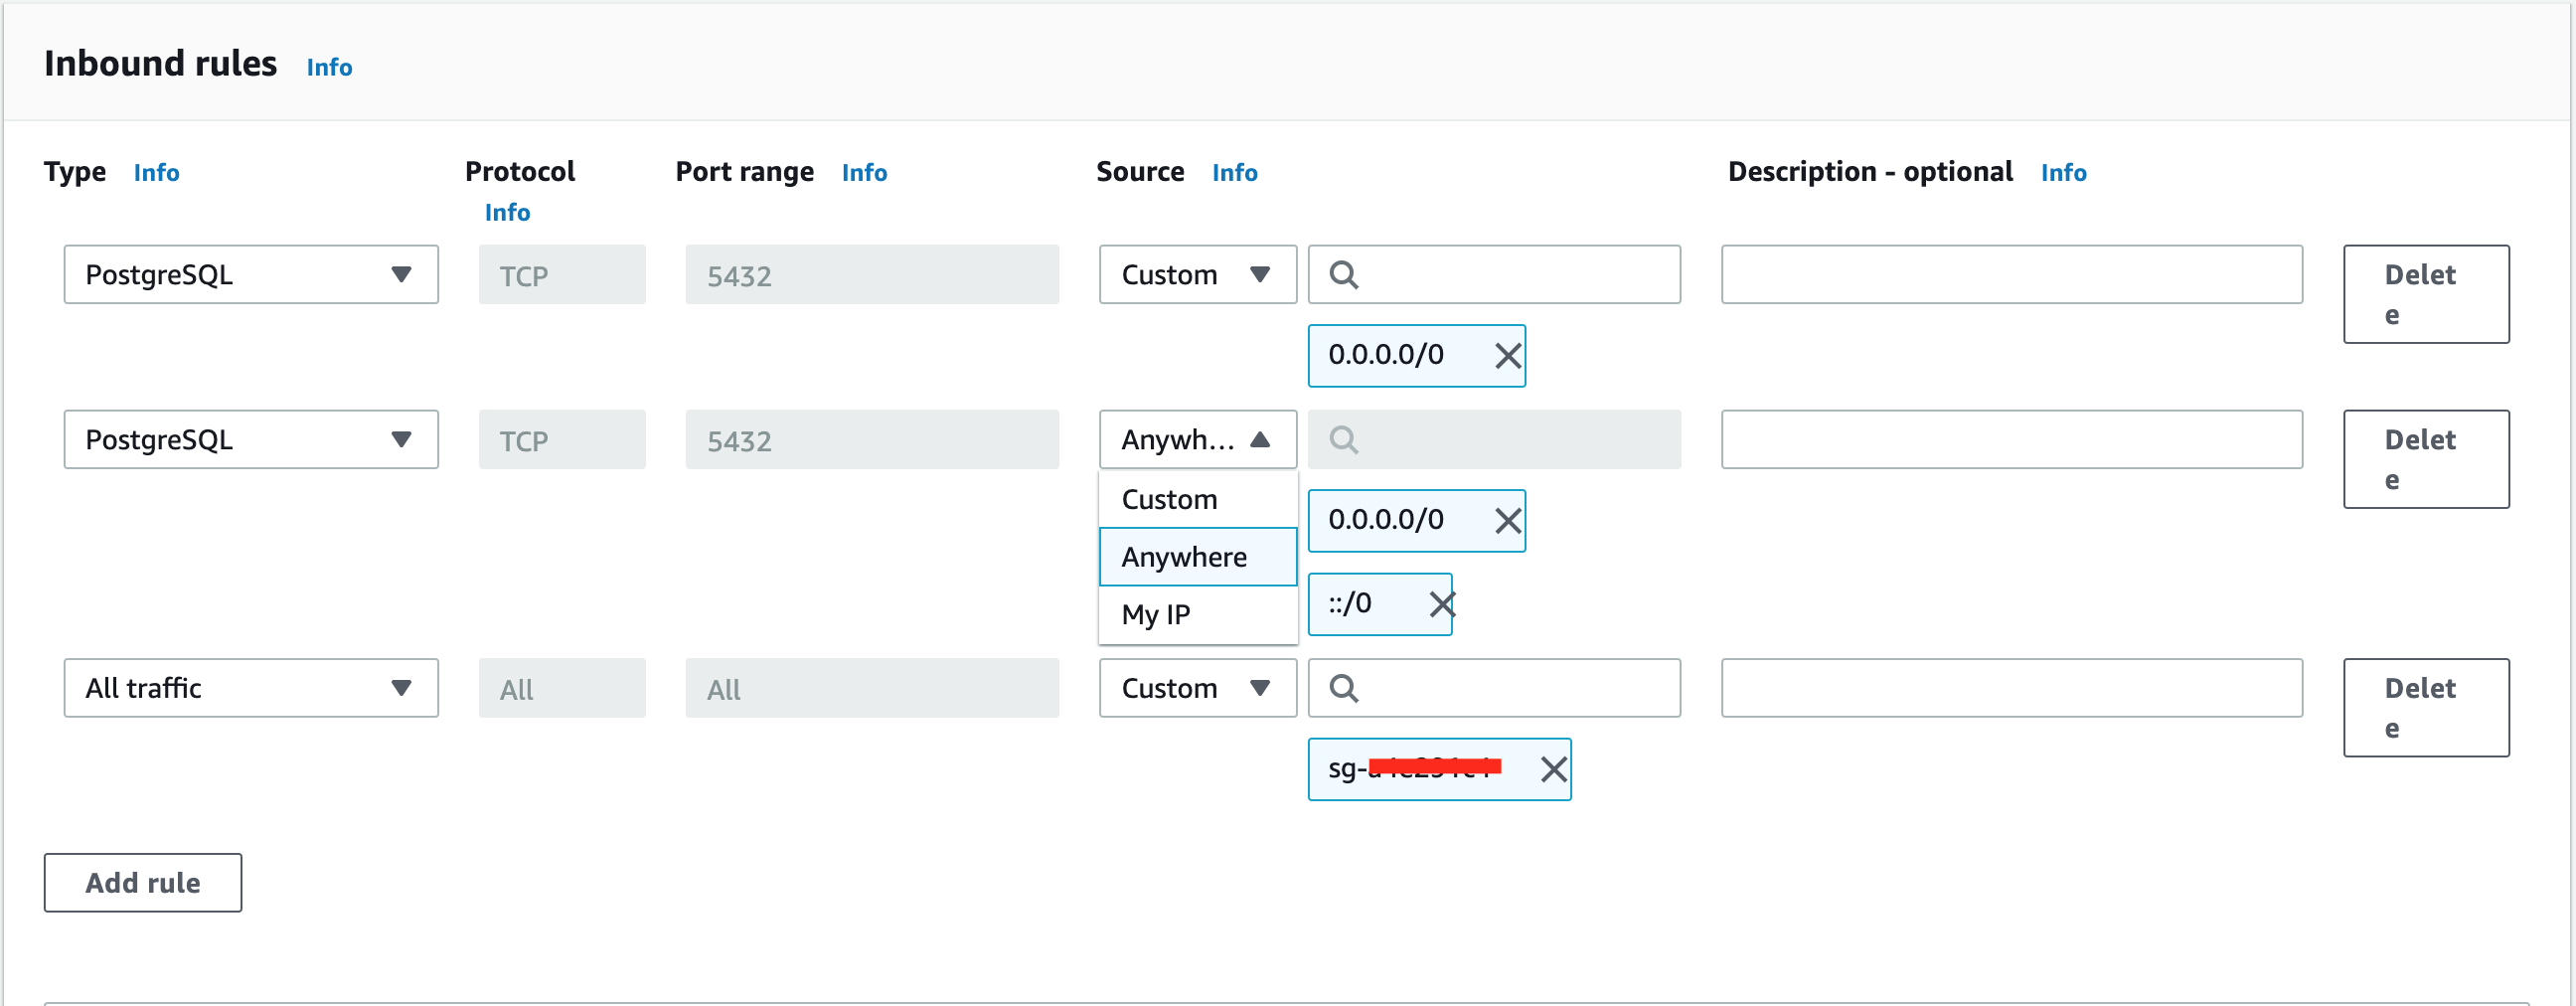
To solve this error, open AWS RDS and select the DB instance name, navigate to Connectivity & Security. There you could see the VPC security Groups.
Please click it, and select Inbound option and Edit it.
After allowing anywhere, you could see proper response in postman.
This is an ever-evolving architecture. With the rise of a serverless relational database, the possibilities are endless in creating entirely serverless infrastructure. I’ve tried my best to explain the process of creating a proper API.

 Please keep the x-api-key and pass it as a header from postman to check the API is working or not.
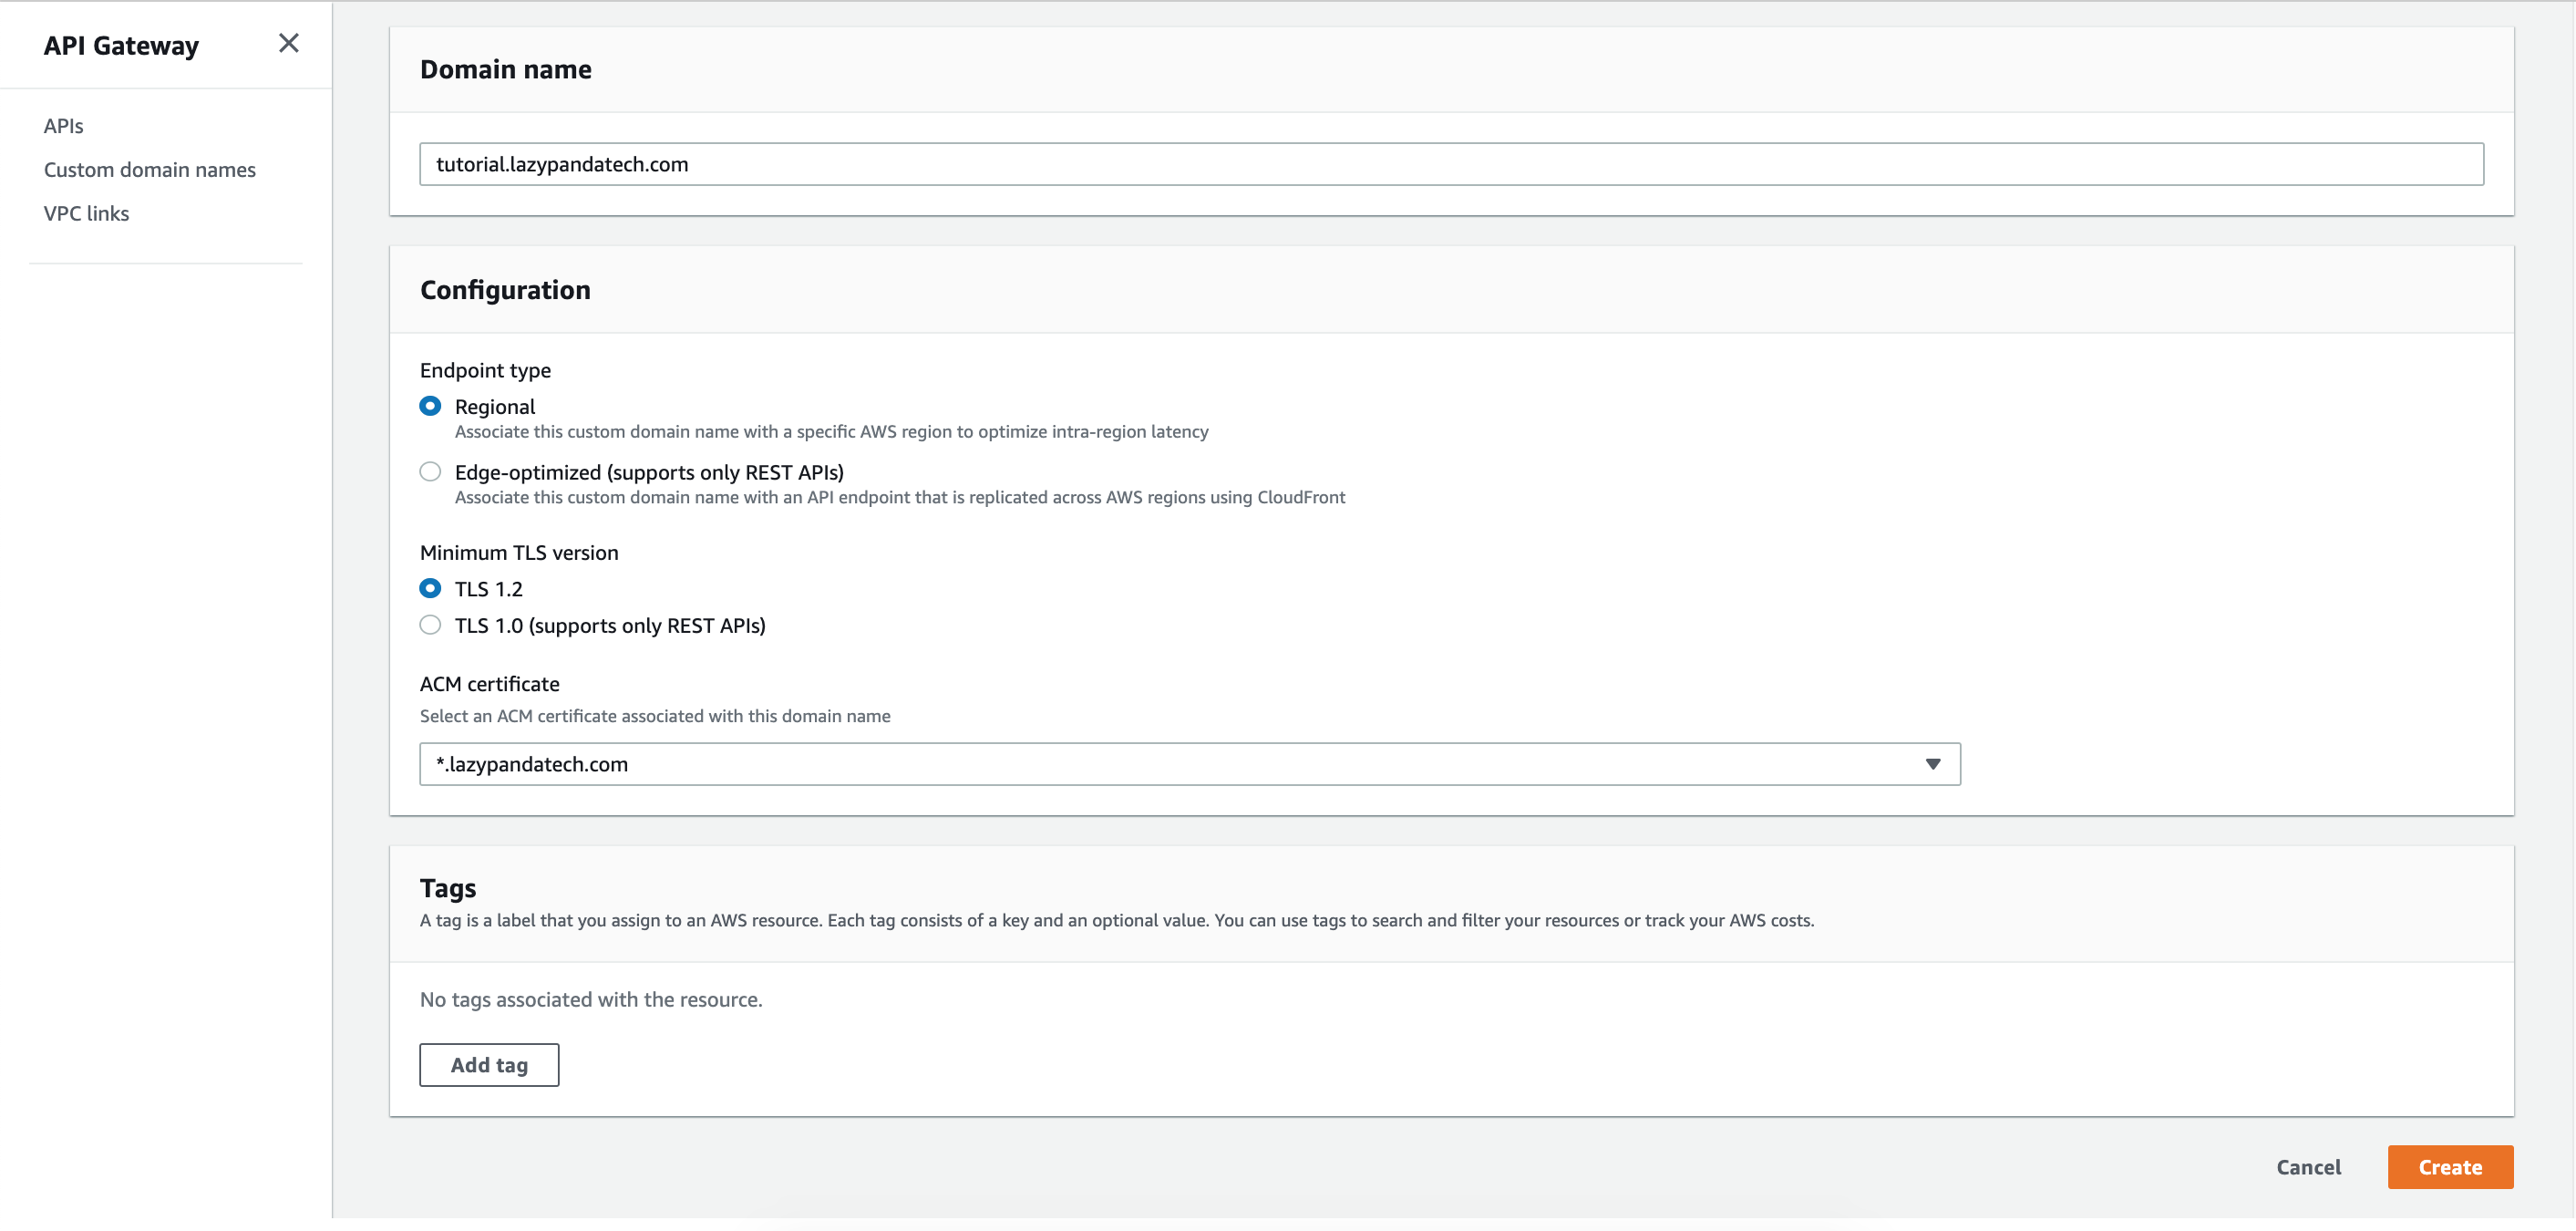
 Please click it, and select Inbound option and Edit it.
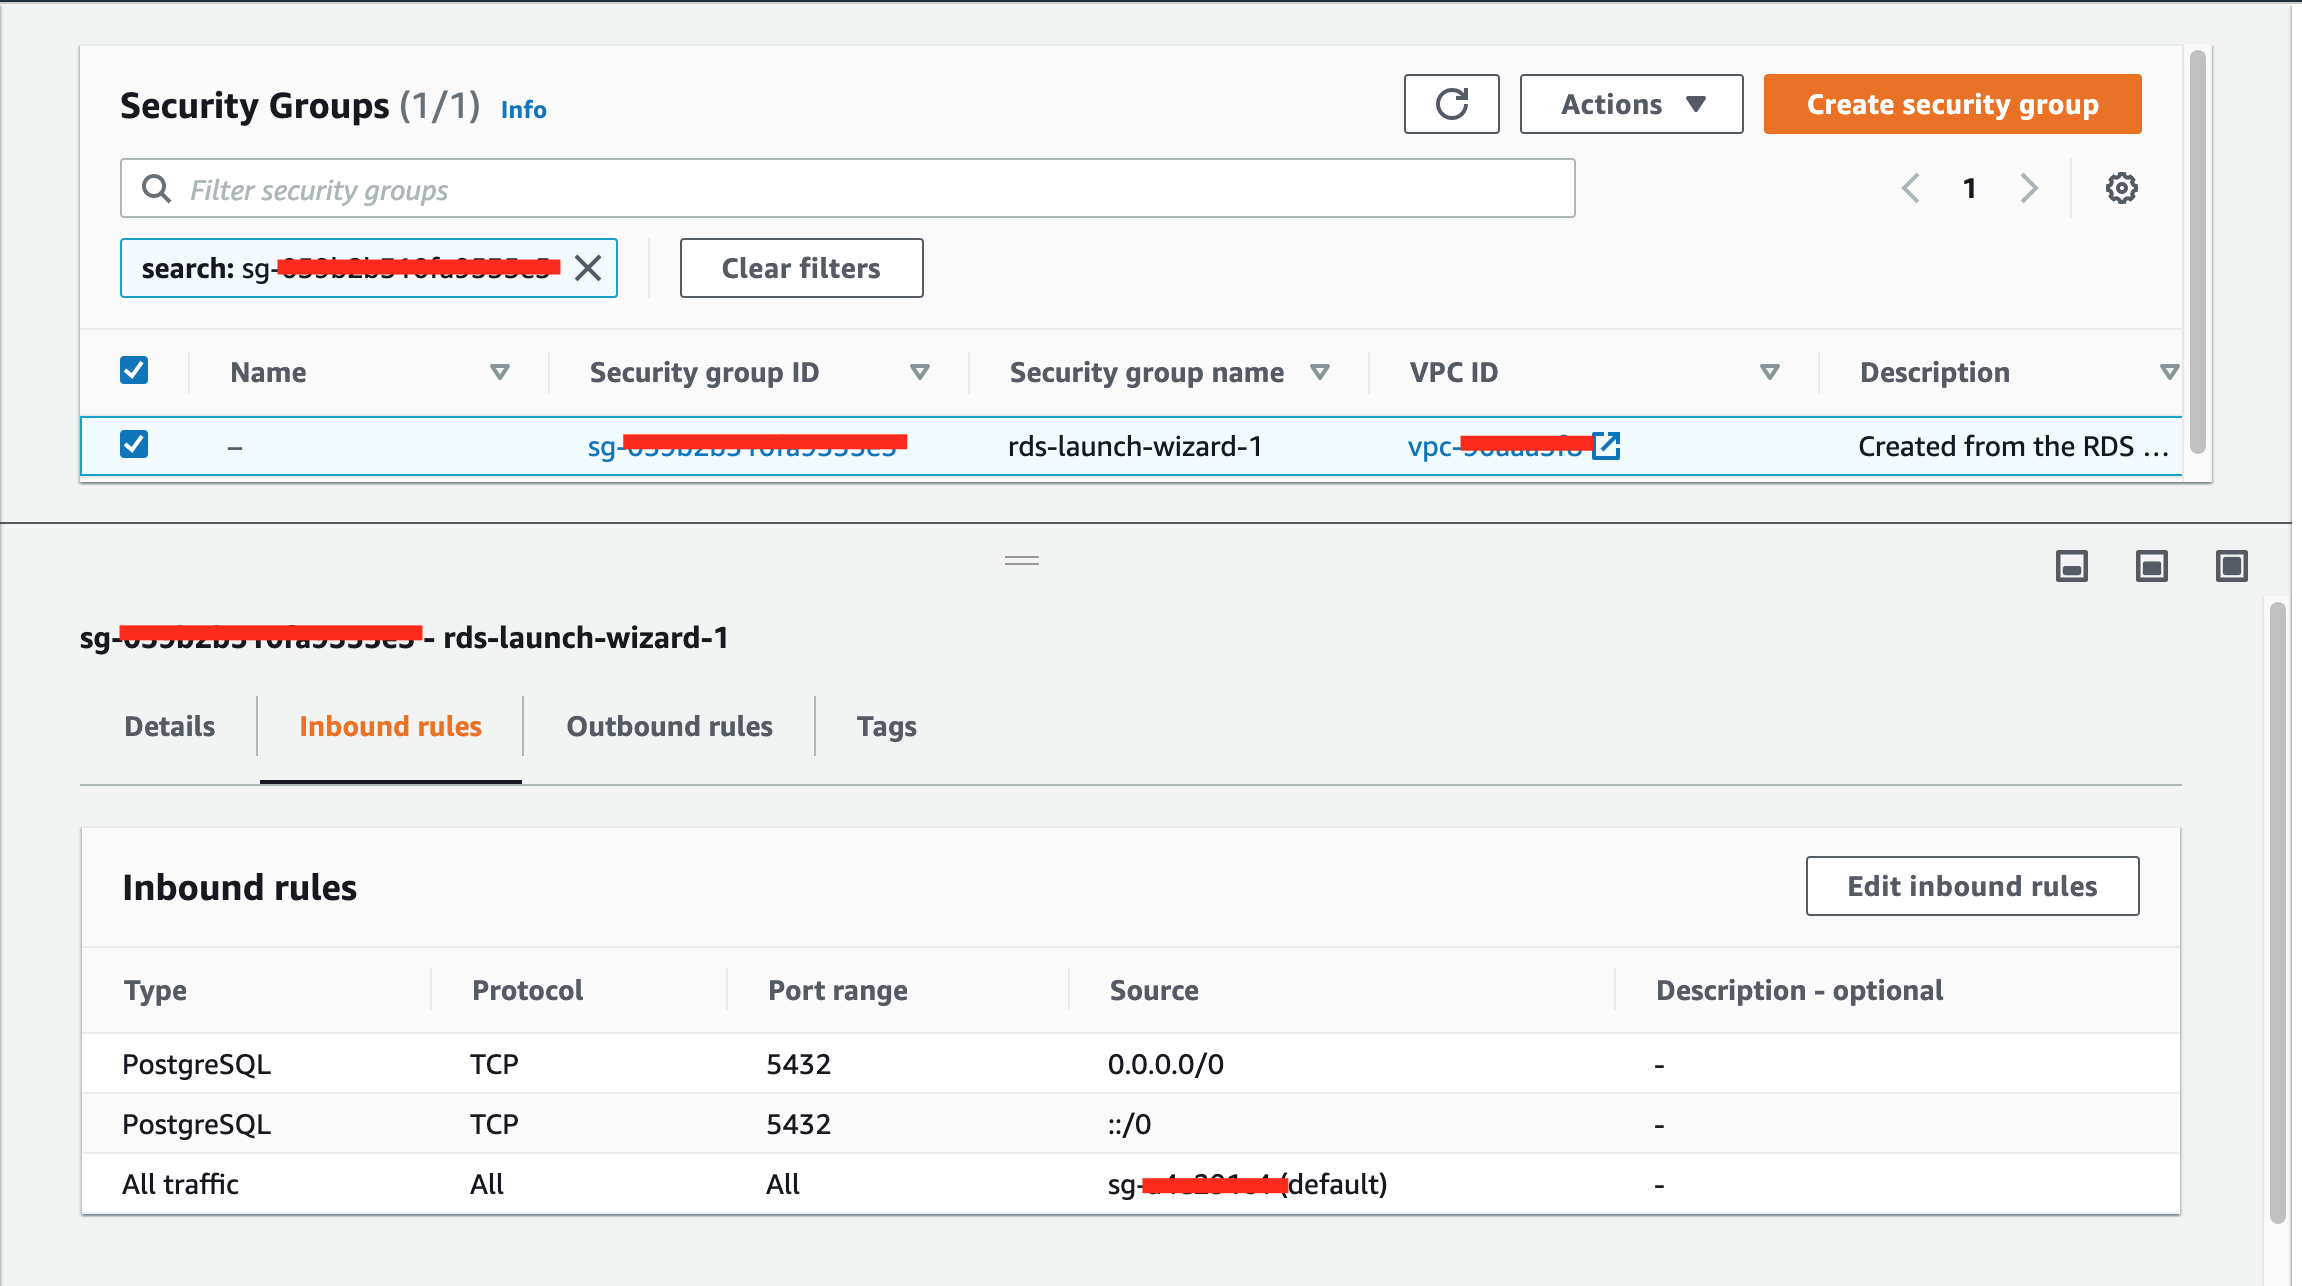
Loading comments...