Google Maps with autocomplete address search drag and drop feature using React
Google Maps JavaScript API and Google place API are one of the best ways to find addresses with suggestive searches also provides visuals on map view by annoting the point. In this article, I demonstrate how the type-ahead search will work using react application. I also add a marker view on Google map with Drag & drop feature of any location.
The goal of this article is as follows -
- Create an account in GCP (Google Cloud Platform)
- Enable google Place API & Google Maps JavaScript API in GCP(Google Cloud Platform)
- Create react application and integrate the search option with displaying any map and address details.
- Restrict users to search in one particular country (Eg. India)
- Display user-selected address.
The place autocompletes address search is a very useful Saas product, provided by google and serves data from the same database used by google maps. The service can be used to provide autocomplete capabilities for text-based geographic searches, returning places like businesses, addresses, and points of interest as the user inputs.
Step 1: Create a User Account in GCP
To leverage Google Place API, we need an API key from Google to leverage the address search feature. Please create an account under Google Developer Console first.
Google Place Autocomplete API is not free (after exceeding the US$200 monthly credit equivalent free usage). To leverage Place API, you need to add the payment information, Google will deduct $1 from your debit or credit card and return back to same account, next time based on user API key usage Google will charge money.
Now coming to pricing, Google has introduced three possible pricing criteria:
- Autocomplete without Places Details – Per Session
- Autocomplete (included with Places Details) – Per Session
- Autocomplete - Per Request
Please visit the map platform site to get more details.
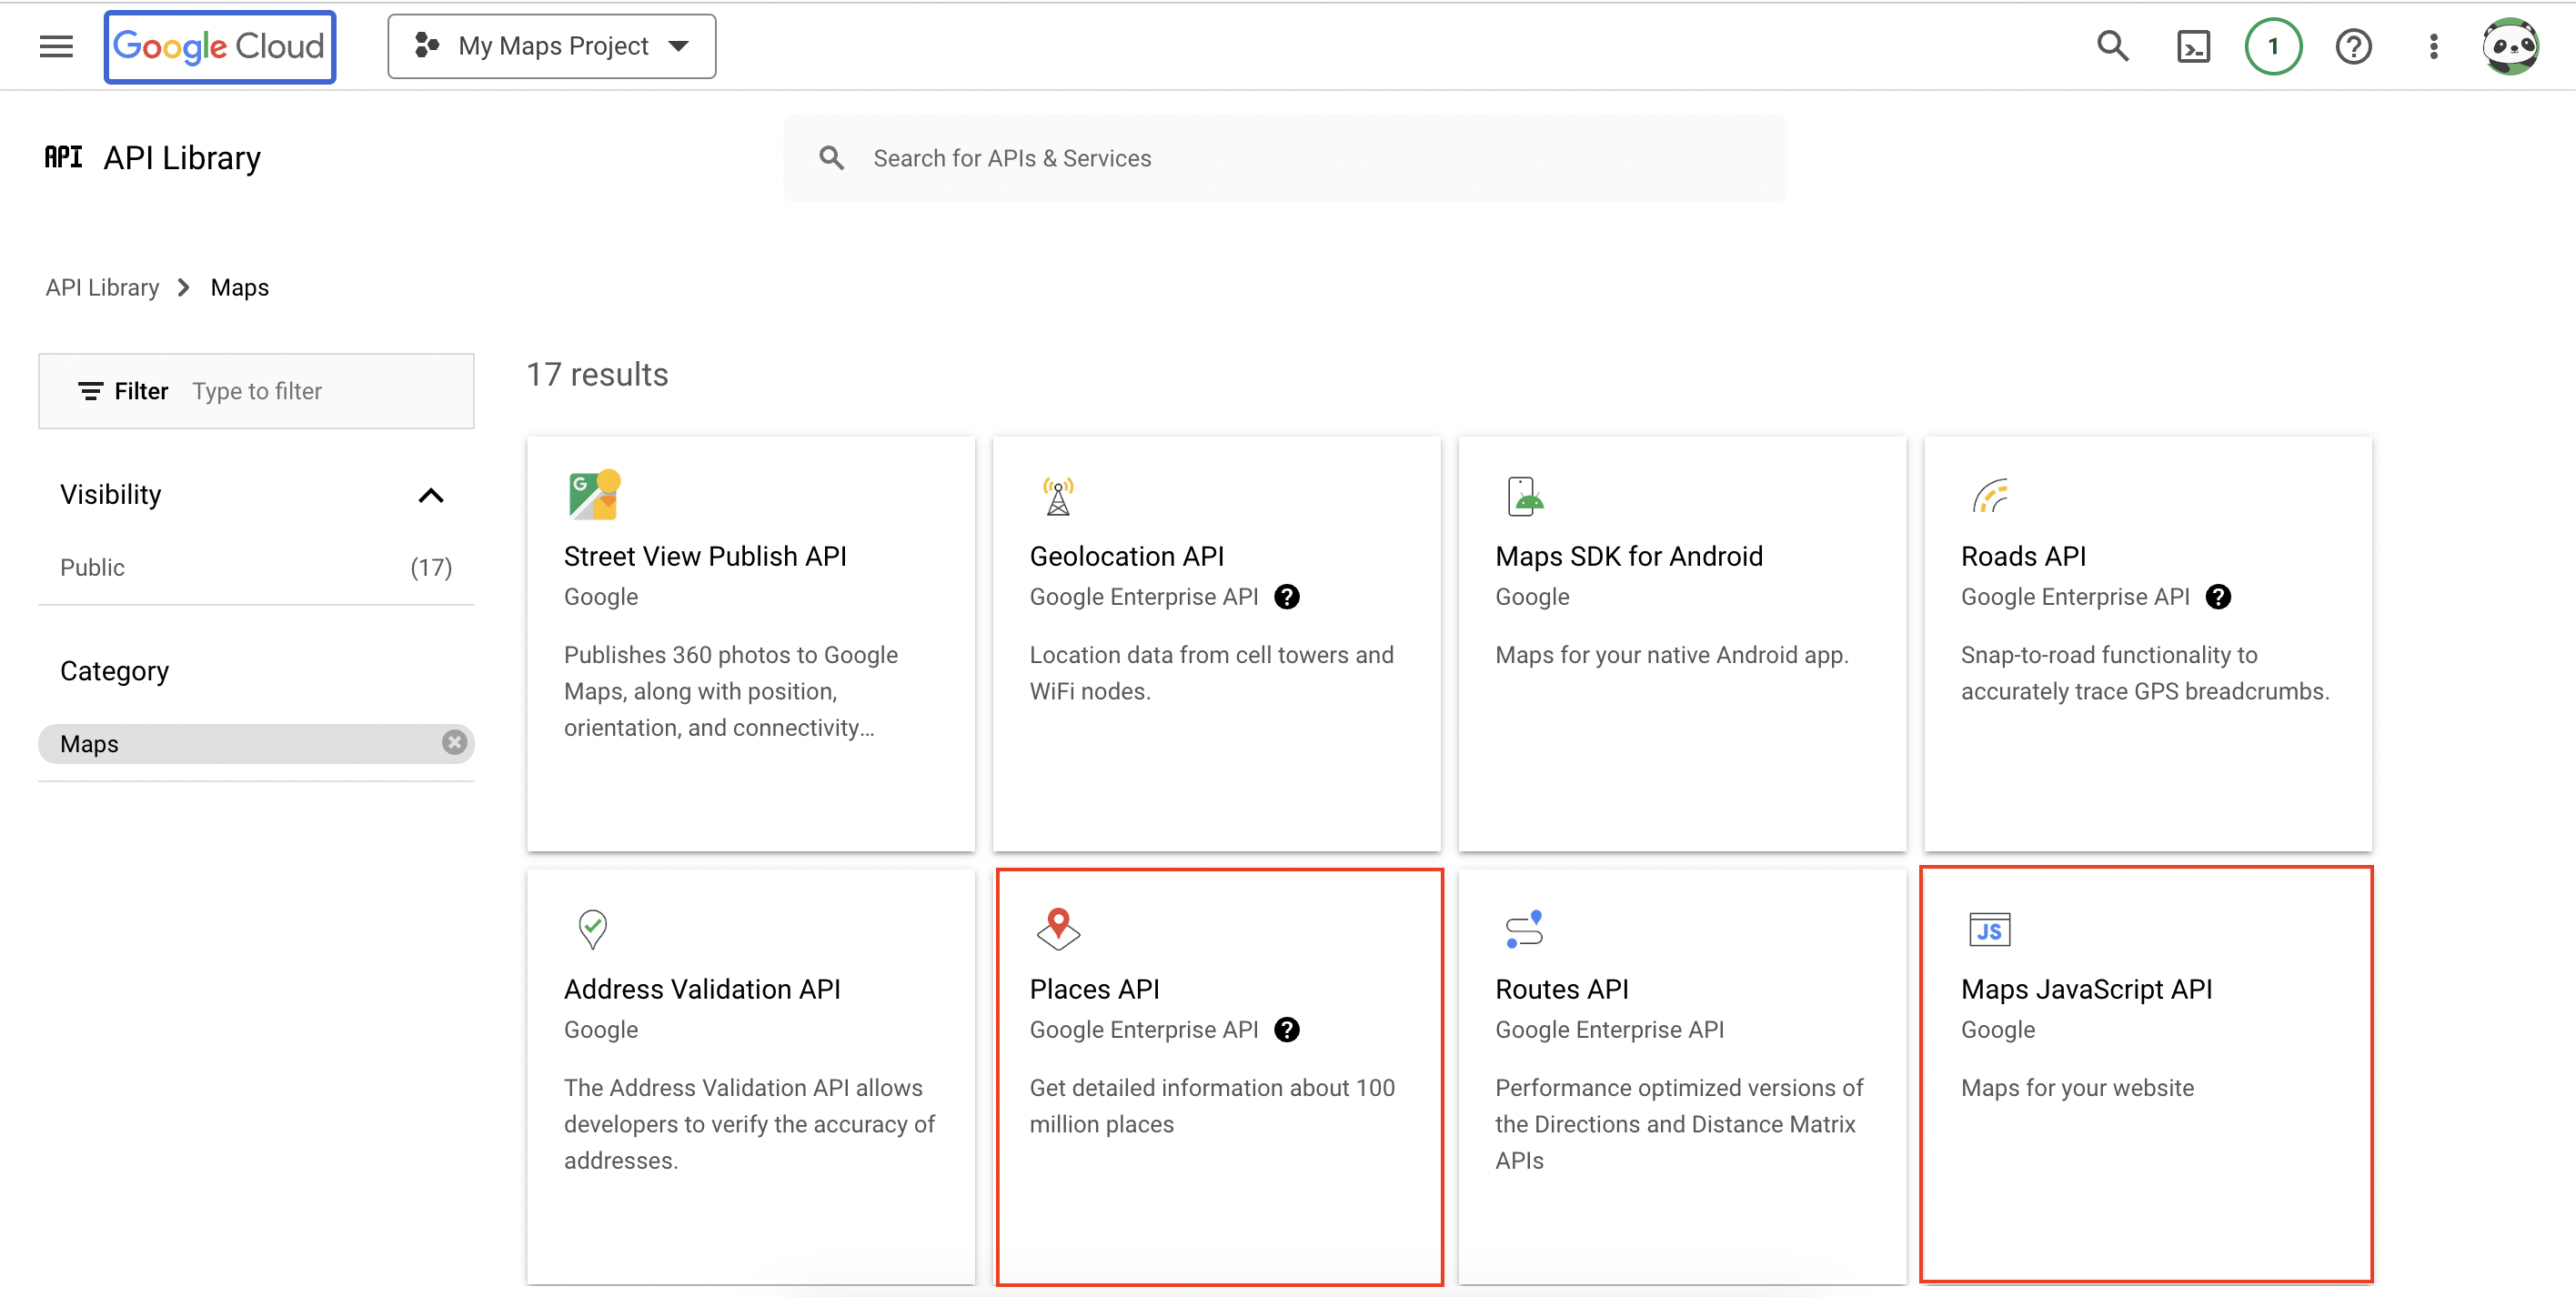
Step 2: Enable Google Place API and Maps JavaScript API in GCP(Google Cloud Platform)
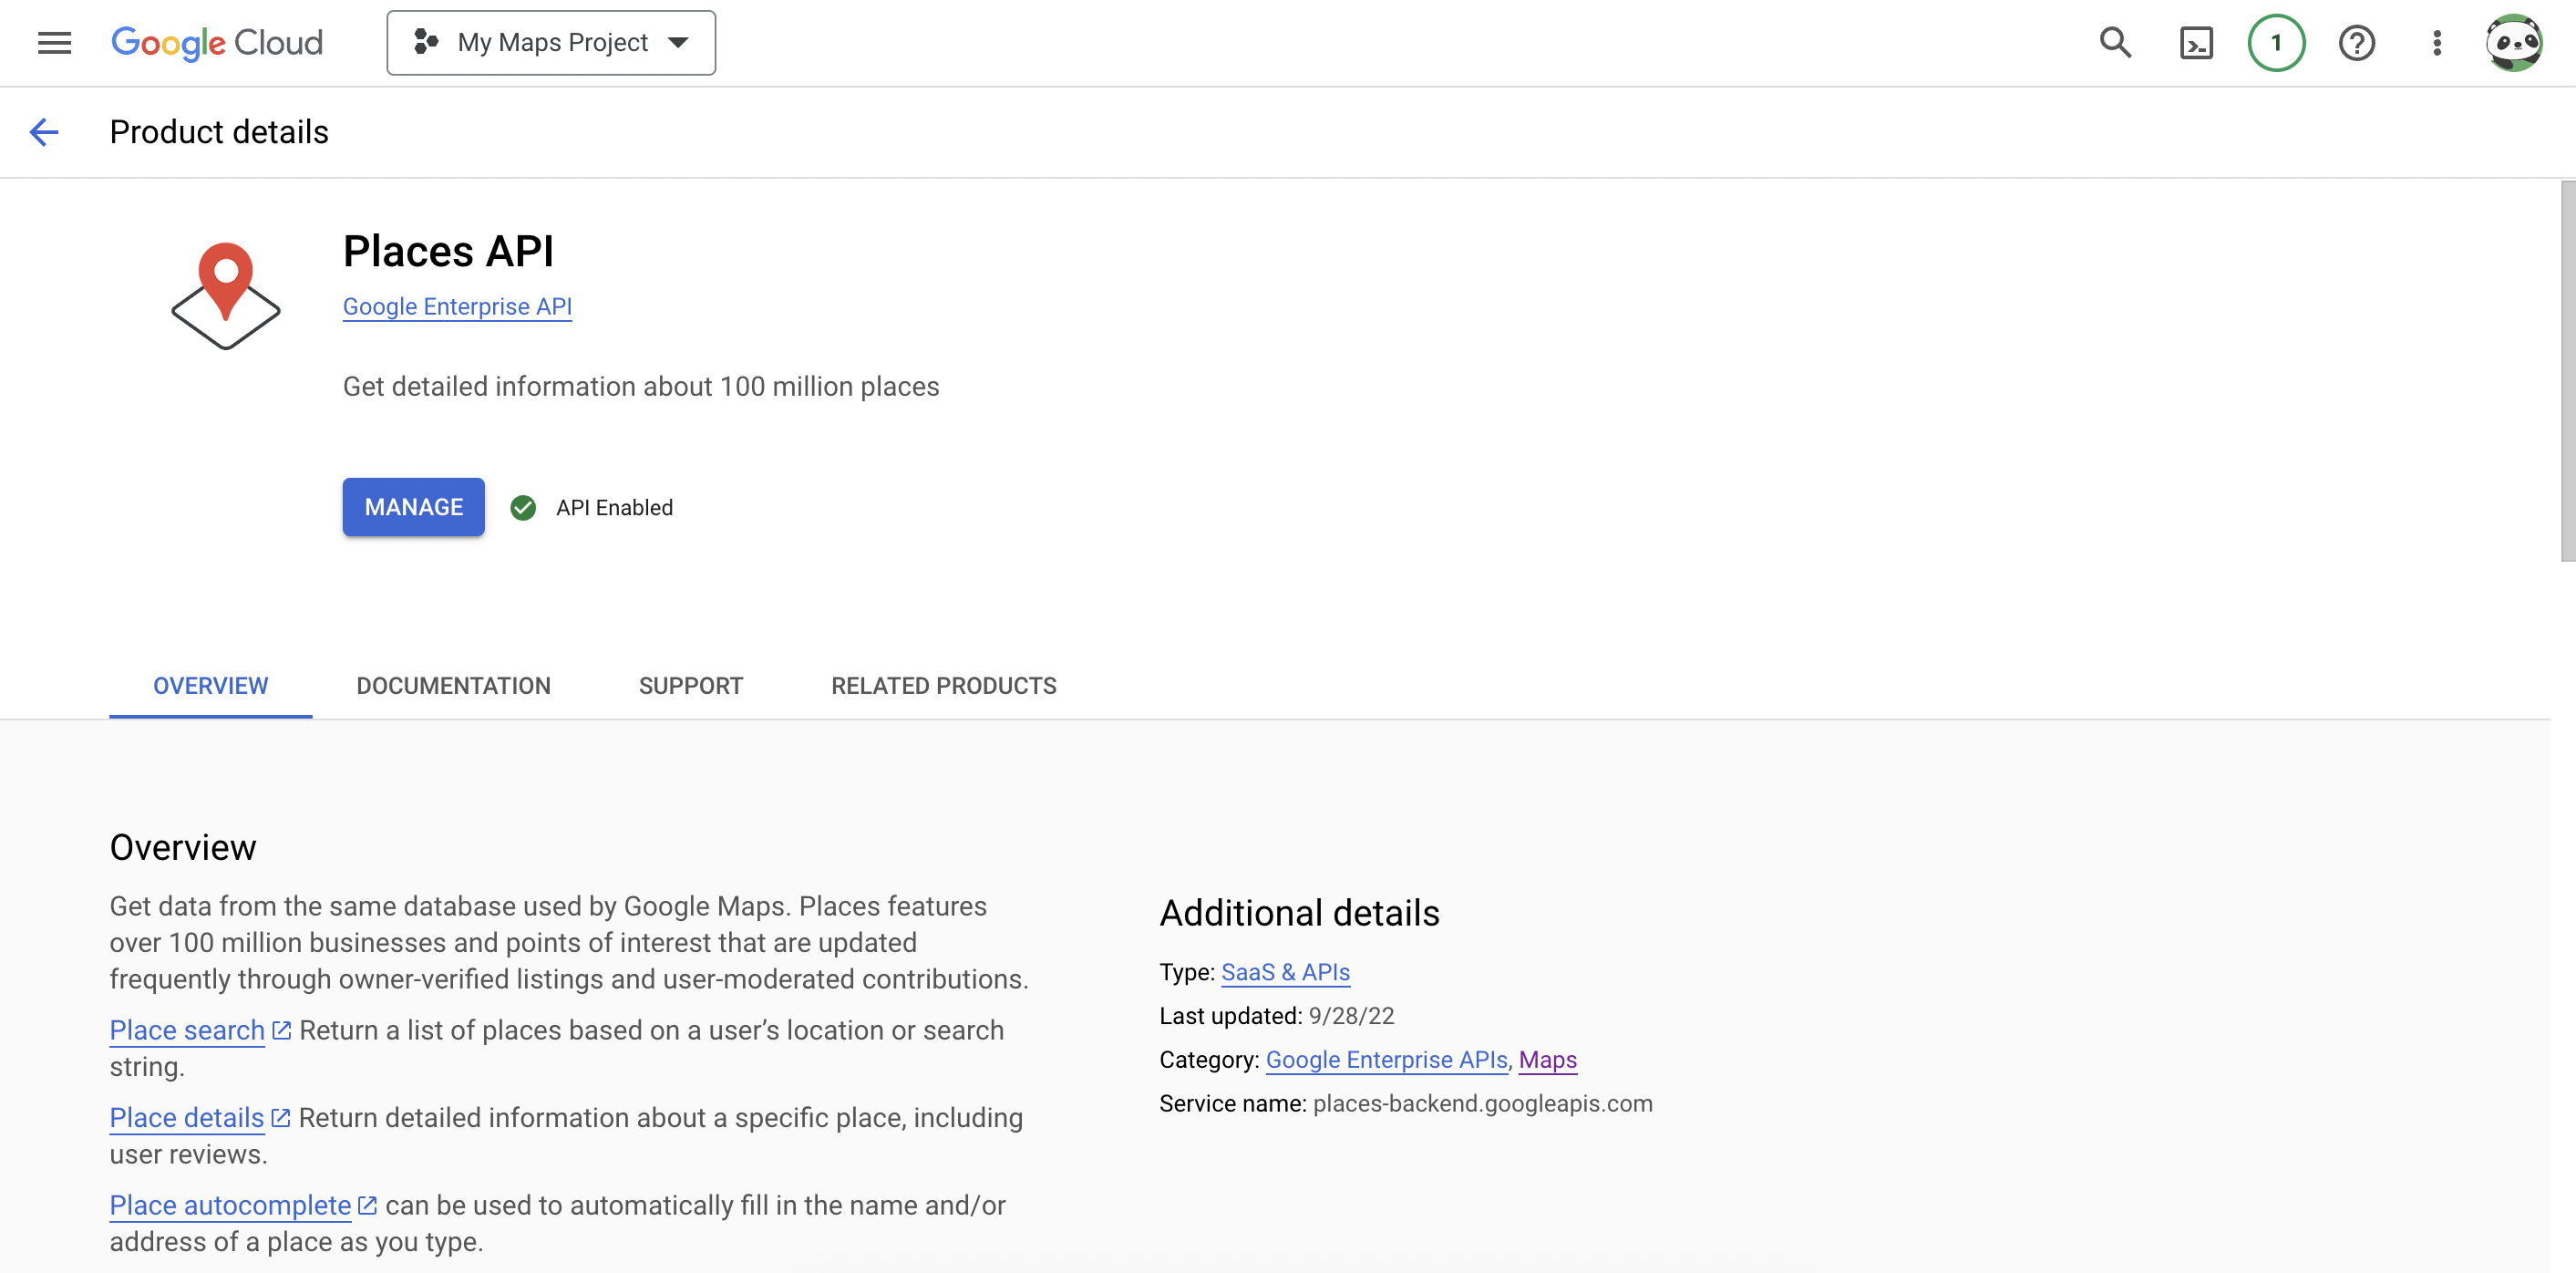
You need to enable the place API. The following screenshots might help you to create a Google API key.
Once the API is enabled, you need to create an API key like the one below -
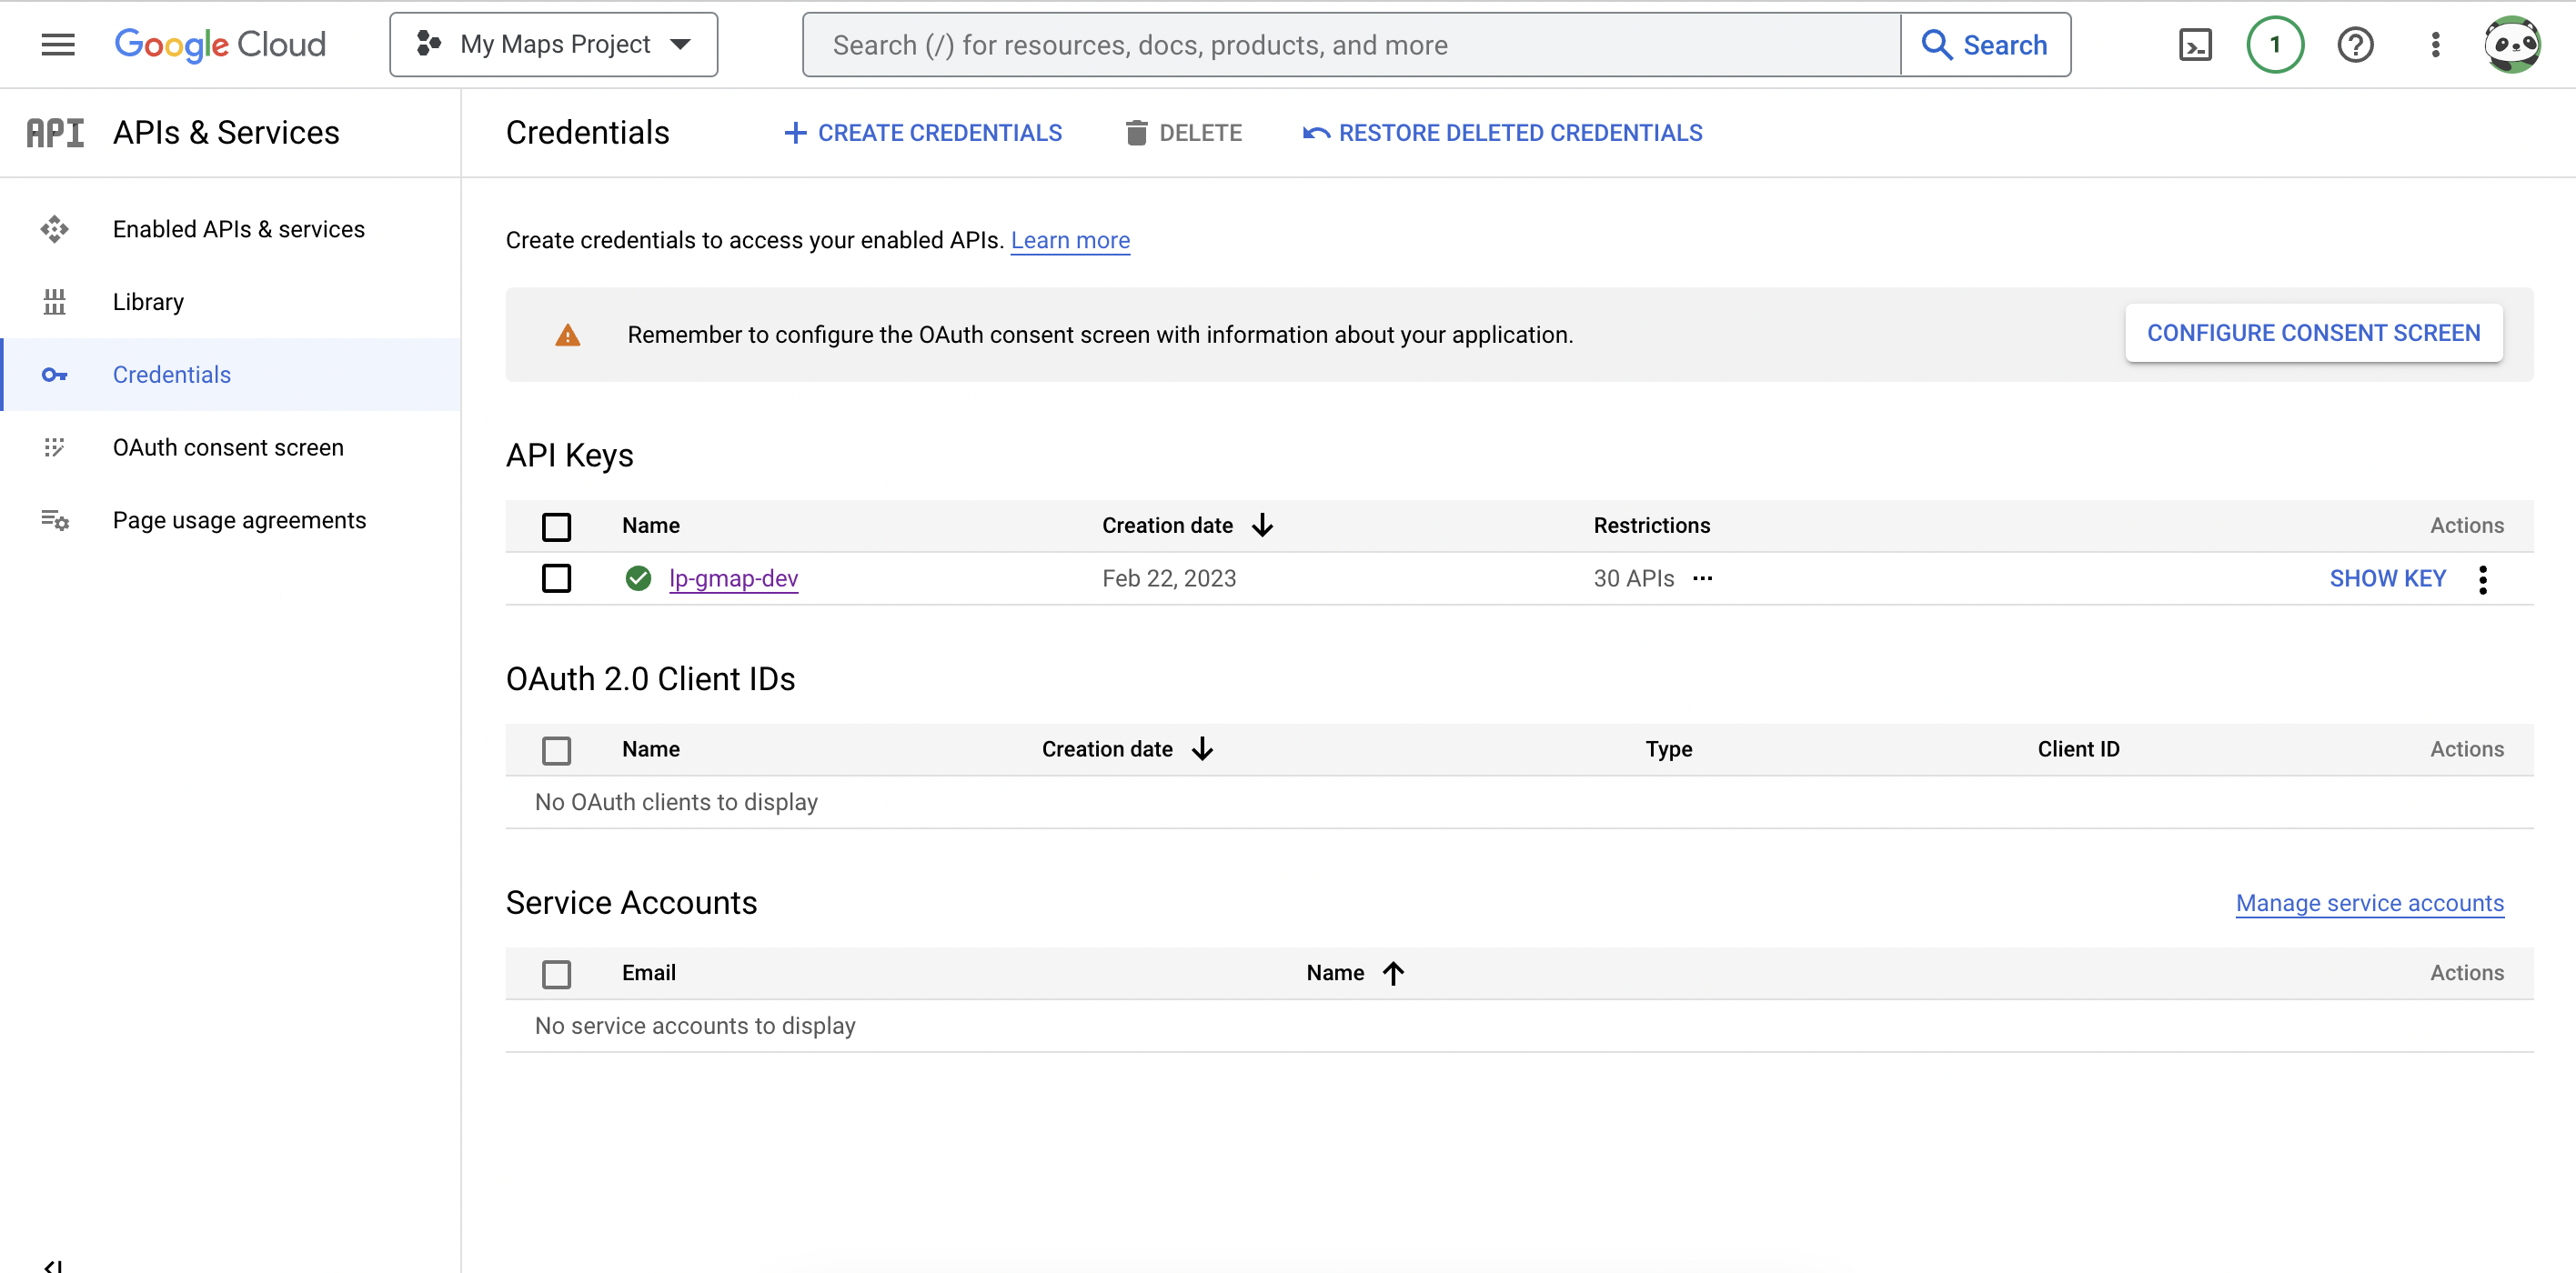
Please copy the API key and add it to your .env file. Also, you can add the restriction to use the API key, so the API will not be misused by unwanted activity.
Step 3: Create react application and integrate the search option without displaying any map.
For this step, I used Vite to generate the react application. After creating the application, I used '@googlemaps/react-wrapper' npm library to configure google Maps. The following diagram will portray to build the application.
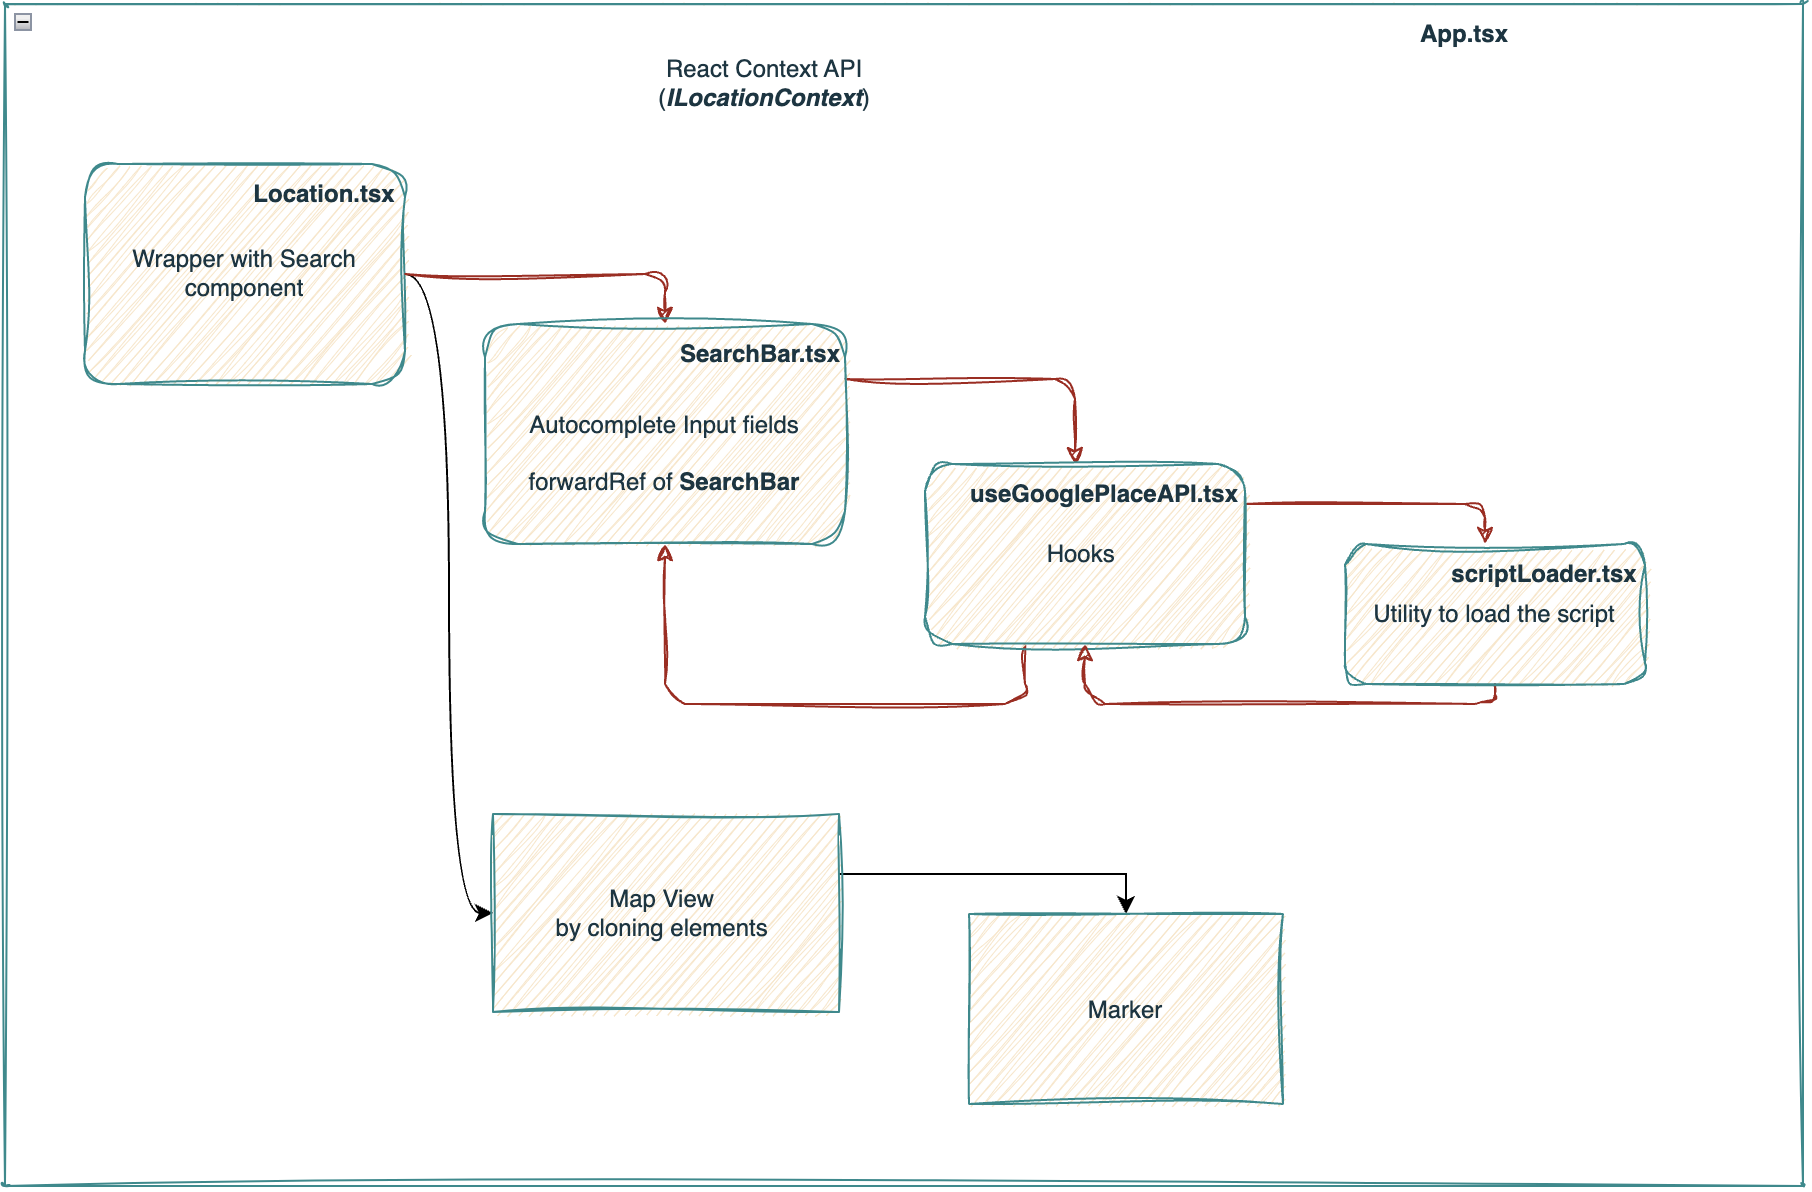
Let's check how the each of component works together.
<div className='root'>
<Wrapper
apiKey='*** YOUR GOOGLE MAP API KEY ***'
libraries={['places']}
render={render}>
<p>Search Bar</p>
<SearchBar
apiKey='*** YOUR GOOGLE MAP API KEY ***'
onPlaceSelected={(selectedPlace: any) => {
console.log('selectedPlace: ', selectedPlace)
const lat = selectedPlace?.geometry.location.lat();
const lng = selectedPlace?.geometry.location.lng();
const geocoder = new google.maps.Geocoder();
const latlng = { lat, lng };
geocoder.geocode({ 'latLng': latlng }, (result, status) => {
if (status === google.maps.GeocoderStatus.OK) {
const placeData = result && result[0];
const addressDetails = placeData?.address_components;
setAddressDetails(addressDetails);
}
});
setLatitude(lat);
setLongitude(lng);
}}
options={{
componentRestrictions: { country: 'IN' }
}} />
<div className='locationContainer'>
<div>
<p>Address details</p>
<Address address={addressDetails} />
</div>
<div>
<p>Interactive Map</p>
<InteractiveMap center={center} zoom={zoom} mapTypeId={'roadMap'}>
<Marker position={center} draggable={true}></Marker>
</InteractiveMap>
</div>
</div>
</Wrapper>
</div>
The highlighted components are the pice of components mentioned in the diagram.
InteractiveMap.tsx
import React, { ReactElement, useContext, useEffect, useRef, useState } from "react";
import LocationContext from "../../context/locationContext";
import './interactiveMap.css';
type Props = {
center: any,
zoom: number,
mapTypeId: string,
children: ReactElement
}
const InteractiveMap = (props: Props) => {
const { center, zoom, mapTypeId, children } = props;
const ref = useRef(null);
const [map, setMap] = useState();
useEffect(() => {
if (ref.current && !map) {
setMap(new window.google.maps.Map(ref.current, {
center,
zoom,
streetViewControl: false,
mapTypeControl: false,
controlSize: 30
}))
}
}, [ref, map]);
return (
<>
<div ref={ref} className='mapContainer' id='map'></div>
{React.Children.map(children, (child) => {
if (React.isValidElement(child)) {
return React.cloneElement(child, { map })
}
})}
</>
);
}
export default InteractiveMap;
React.cloneElement has been used to draw the map.
React.cloneElement(element, [props], [...children])
React.cloneElement()is useful when you want to add or modify the props of a parent component’s children while avoiding unnecessary duplicate code.
Here, the marker needs to be added on top of the map after it gets initialize. So, child is the marker component and map ref is being passed to draw on top of the container. If I do not use the cloneElement() method, the marker will not get rendered on top of the map.
Marker.tsx
The complete codebase is available in the following repository, feel free to check this from here.
Happy Coding!
-LP
Loading comments...