SEO friendly URL with Angular 9 Angular Universal and Prerender strategy
For SPA (Single-Page-Application), it is difficult to get a search engine to crawl to your site, find keywords, and list it in your hard work in google/bing search results. I have been trying to get search engines crawled to my site so that the individual blogs should show in search results. But in spite of getting success, every time I made a fix in the sitemap.xml file and requested google to crawl my page, it was rejected with 404 (Page not found), though my page was correctly opening in browse and working fine as well. Then I realized, that there are certain rules that are very much required to have in URL structure and when you are building your routing rules in your application, you must be thinking of all the rules and then configure your application in such a way so that google can crawl and get all the keywords.
SEO friendly URL creation and utilizing Universal with Prerender strategy make well performed webpages and a smooth user experience. Lets do it...
I do believe that you have already built your application with Angular Universal, if not and are interested to use Universal, please check out my previous blog "SEO Enablement to an Angular application". Angular Universal has a two-part -
Server-Side Rendering (SSR)
In that case, the Angular application will run into a node server. For instance, if you are using an AWS bucket for your code deployment, you can't do it with static webpage hosting as the node server will not run. You have had to use an EC2 instance or serverless Lambda function to deploy your code, and for that, you need to pay as much as your EC2 instance runs or serverless functions get executed. It might end up with a lot of billing.
Server-side Rendering is not as first as Client-side rendering as the request goes out from the Client browser to the node server, the node server will process your request and then send it back to the client, and the client browser will render the page. It is much slower than client-side rendering.
Client-Side Rendering
Client-side rendering is leveraging the Prerender strategy. During building time it will generate different index.html files in your dist folder based on URL structure. As all the respective HTML is already present in your dist folder, it is very fast and the node server will not run at all when a request comes from the browser. And that is why this code can be used as an S3 bucket only for static webpage hosting. No need for an EC2 instance or serverless Lambda function to run your website. You can live with an S3 bucket to host your website at a very low cost (approx. < 1$)
In this blog, I am going to use Prerender strategy with angular universal, so that the respective website will be first in terms of performance and SEO enabled. To utilize prerender, you need to configure your routing properly so that, the search engine can crawl your webpage.
Do Not Use Query String-based URL - (Deep Link)
Example: (Wrong)Google will never crawl your page it returns 404, though the page will work in a real environment.
If you want to add the title to your URL, make sure you should use '-' (Hyphen) not '_' (Underscore). URL encoding will not help much though for the crawl.
Do not use the same word multiple times in your URL.
URL length must be below 512 px, the rest of the part Google will truncate in its search results page. Good to use a short URL as much as you can.
Correctly use the canonical tag for your URL.
Create your application sitemap.xml & robots.txt file as well.
The following URL structure should be created - a clear and parameterized -
Create another module called - app.browser.module.ts -
Create a routes.txt file in the parent folder and mention the different route paths there. You can add your path programmatically to run a simple js file during building time as well.
Import ServerTransferStateModule into app.server.module.ts file as well. That's it, now build - npm run prerender
You will see the following difference -
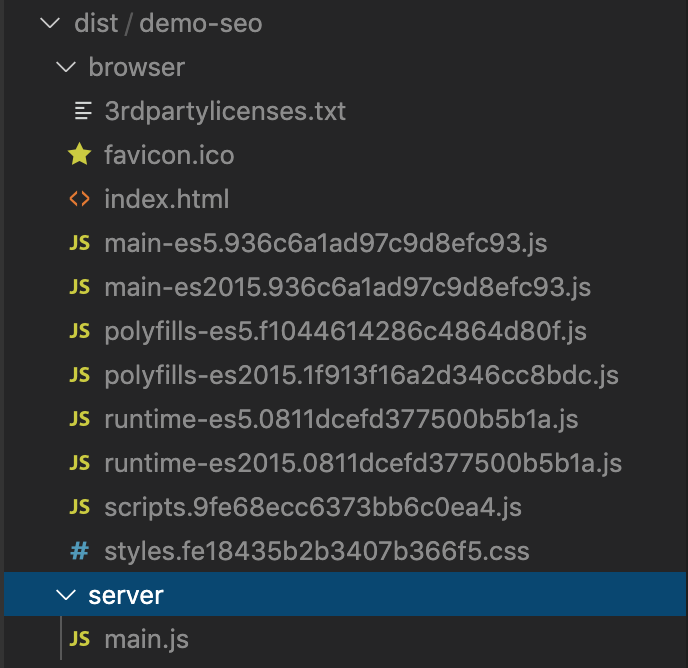
Before prerender - npm build --prod
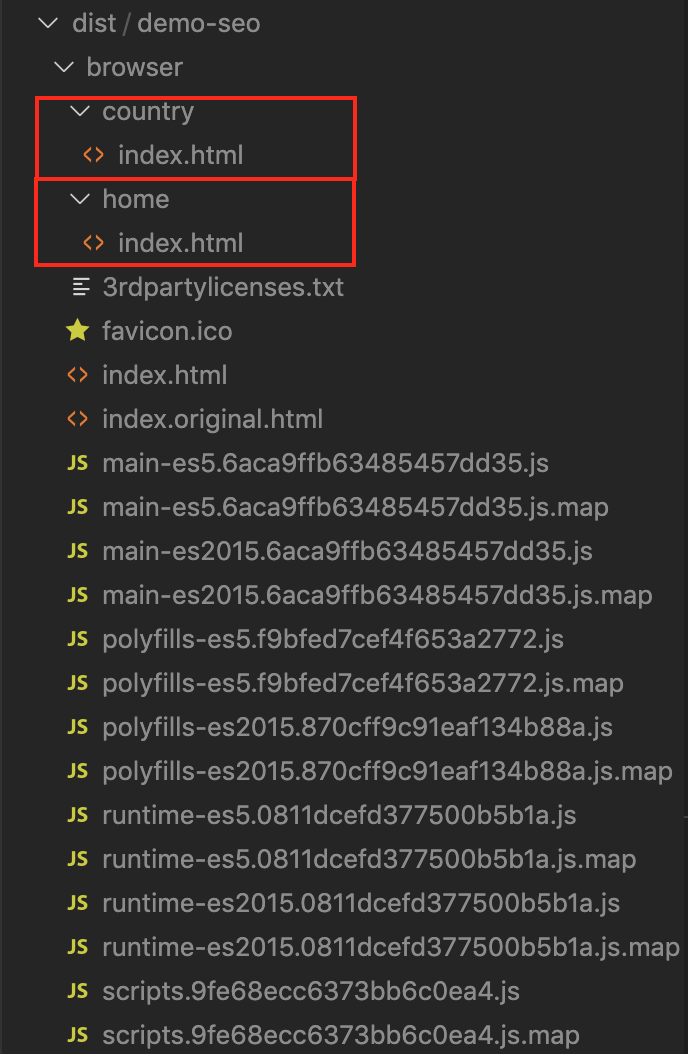
After Prerender - dist folder structure -
As it is created multiple index.html files based on routing, it is mostly 5 times faster than Server Side Rendering and SEO controlled of course. For more information and visualize the complete application with sort of route automation in my below video. And also there is an analytical optimization shown on the Google Search Console site about application performance and how to post your site maps there as well.

Loading comments...